


Models
>
MVWB765FW2
MVWB765FW2 Whirlpool
Jump to:
Find Part by Name
Keep searches simple, eg. "belt" or "pump".
Diagrams for MVWB765FW2
Viewing 6 of 6


 Diagram and Parts List for Whirlpool")
Keep searches simple, eg. "belt" or "pump".

$5.42
This is a multi-use screw and can be used on a variety of appliances. The measurements of the screw are: 8/18 x 3/8. *Please note: the screw is sold individually. Refer to the manual provided by the m...
In Stock
Order within the next 59 mins and your part ships today!

$8.00
This 18 ml bottle of white appliance touch-up paint is used to cover scratches or marks on your appliance. The white touch-up paint can be used on refrigerators, microwaves, ranges, clothes dryers, an...
In Stock
Order within the next 59 mins and your part ships today!

In Stock
Order within the next 59 mins and your part ships today!

In Stock
Order within the next 59 mins and your part ships today!

In Stock
Order within the next 59 mins and your part ships today!

$367.43
This lid is for washers.
The lid covers the washer tub opening.
Wear work gloves to protect your hands when installing this part.
In Stock
Order within the next 59 mins and your part ships today!

In Stock
Order within the next 59 mins and your part ships today!

In Stock
Order within the next 59 mins and your part ships today!

In Stock
Order within the next 59 mins and your part ships today!

In Stock
Order within the next 59 mins and your part ships today!

In Stock
Order within the next 59 mins and your part ships today!

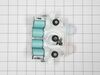
$25.32
This lid hinge is a genuine OEM replacement part for your washing machine. This hinge is for the left side of your lid, although it is a good idea to replace btoh hinges at once. The hinge holds up th...
In Stock
Order within the next 59 mins and your part ships today!
Questions and Answers
We're sorry, but our Q&A experts are temporarily unavailable.
Please check back later if you still haven't found the answer you need.
Common Problems and Symptoms for MVWB765FW2
Viewing 8 of 8Leaking
Fixed by these parts


How to fix it
Lid or door won’t close
Fixed by these parts


How to fix it
Will not agitate
Fixed by these parts


How to fix it
Will not drain
Fixed by these parts

How to fix it
Will Not Start
Fixed by these parts
How to fix it
Water Filling Issues
Fixed by these parts
How to fix it
Does not dispense fabric softener or detergent
Fixed by these parts

How to fix it
No hot or cold water
Fixed by these parts
How to fix it


Keep searches simple. Use keywords, e.g. "leaking", "pump", "broken" or "fit".
- Customer:
- Michelle from Richardson, TX
- Parts Used:
- 72017
- Difficulty Level:
- Really Easy
- Total Repair Time:
- Less than 15 mins
Scratches in Surface
This product comes in a bottle with a brush like Liquid Paper. It goes on incredibly easy. A second coat might be needed. I wanted to prevent rust from setting in so I covered the scratches and dings. The paint is a little brighter since my washer is 10 years old but it still looks great.
Was this instruction helpful to you?
Thank you for voting!
- Customer:
- Greg from RICHMOND, VA
- Parts Used:
- W11259006
- Difficulty Level:
- Easy
- Total Repair Time:
- 30 - 60 mins
- Tools:
- Socket set
Broken lid frame at left hinge.
Raised lid to remove two Torx head screws from each hinge. Lid will then lift off of hinges. Installation of new lid was the reverse of the removal procedure. It is best to install one hinge to the lid by removing that hinge from the washer. The lid can then be installed by inserting that hinge into it's spot and then over the other hinge
... Read more
. Install the hinge screws into the second hinge and the job is complete. The lid now closes properly allowing the automatic lid lock to function properly.
Read less
Was this instruction helpful to you?
Thank you for voting!
- Customer:
- Gary from GLADE VALLEY, NC
- Parts Used:
- W11259006
- Difficulty Level:
- Easy
- Total Repair Time:
- 15 - 30 mins
Lid was broken at the hinge and would not stay closed
Removed the old lid by removing the two screws on both sides of the lid holding it to the hinge. Then pull upon the lid to remove. Slide the new lid back on the hinges being careful to slide in the right slot in the lid. Replace the screws through the lid into the hinges and your done
Was this instruction helpful to you?
Thank you for voting!