


Models
>
CAW35114GW1
CAW35114GW1 Whirlpool
Jump to:
Find Part by Name
Keep searches simple, eg. "belt" or "pump".
Diagrams for CAW35114GW1
Viewing 6 of 6
Keep searches simple, eg. "belt" or "pump".

Commonly referred to as dog ears, these agitator directional cogs are manufacturer approved replacement parts that come in a package of 4 and are usually used with direct drive washing machines. We re...
In Stock

$10.04
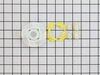
This is an authentic OEM agitator cam kit for your washing machine. The kit includes a bearing, the cam holder, and four individual cams. You may need to replace the agitator cam if you find your wash...
In Stock

In Stock

The O-Ring is included with this cap. It can be purchased separately as Part #WPW10072840.
In Stock

$19.71
The drive belt works with the pulley in your washer in order to spin the tub. If you notice a burning rubber smell, your washer has become excessively noisy, or it will not spin, it could indicate an ...
In Stock

$54.38
The washer drive pulley kit is also known as a replacement clutch assembly, or a cam kit. The drive pulley is found at the bottom of your washing machine, mounted to the drive shaft. Common symptoms i...
In Stock

$5.42
This is a multi-use screw and can be used on a variety of appliances. The measurements of the screw are: 8/18 x 3/8. *Please note: the screw is sold individually. Refer to the manual provided by the m...
In Stock

$157.13
This agitator comes with the 4 agitator dogs (cogs) and top mover. The cap is NOT included with the agitator.
In Stock

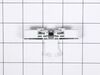
This is a genuine OEM door lock assembly for a top load washing machine. This part is also known as a door switch, and it is used to communicate whether the door to the washer is opened or closed. If ...
In Stock

$8.00
This 18 ml bottle of white appliance touch-up paint is used to cover scratches or marks on your appliance. The white touch-up paint can be used on refrigerators, microwaves, ranges, clothes dryers, an...
In Stock

In Stock

$70.56
If your washer is leaking, will not fill with water, or will not stop filling, there may be an issue with your water inlet valve. This part is used to control the flow of hot and cold water into the w...
In Stock
Questions and Answers
We're sorry, but our Q&A experts are temporarily unavailable.
Please check back later if you still haven't found the answer you need.
Common Problems and Symptoms for CAW35114GW1
Viewing 15 of 15Will not agitate
Fixed by these parts


How to fix it
Leaking
Fixed by these parts


How to fix it
Spins slowly
Fixed by these parts


How to fix it
Does not dispense fabric softener or detergent
Fixed by these parts

How to fix it
Will Not Start
Fixed by these parts

How to fix it
Spinning Issues
Fixed by these parts
How to fix it
Burning smell
Fixed by these parts
How to fix it
Lid or door won’t close
Fixed by these parts

How to fix it
No hot or cold water
Fixed by these parts

How to fix it
Will not drain
Fixed by these parts
How to fix it
Shaking and Moving
Fixed by these parts

How to fix it
Marks left on clothes
Fixed by these parts
How to fix it
Locking Issues
Fixed by these parts
How to fix it
Water Filling Issues
Fixed by these parts
How to fix it
Not cleaning dishes properly
Fixed by these parts
How to fix it


Keep searches simple. Use keywords, e.g. "leaking", "pump", "broken" or "fit".
- Customer:
- mike from Kent, WA
- Parts Used:
- 80040
- Difficulty Level:
- Easy
- Total Repair Time:
- 15 - 30 mins
- Tools:
- Screw drivers, Socket set
washer wouldn't agitate
First pry off the cap of the agitator. Then using a socket remove the bolt that holds the plastic cup in place. Remove this cup by prying it loose from the two tabs that hold it in place. Once this cup is removed you can get to the broken cogs.
Slip the new cogs into the underside of the cup, and slide the cup back down in the a ... Read more gitator housing using the slots on the side for a guide. (You may want to remove the entire agitator and assemble everything upside down, then flip it all back over to mount, so the cogs don't fall out).
Tighten the bolt, snap the cap back in place on top of the agitator and your'e done. Easy repair.
Read less
Was this instruction helpful to you?
Thank you for voting!
- Customer:
- dennis from new stanton, PA
- Parts Used:
- 80040
- Difficulty Level:
- Really Easy
- Total Repair Time:
- Less than 15 mins
- Tools:
- Socket set
top half of agitator did not move during wash cycle
pull off softner dispenser, pop off agitator cap by inserting straight screw driver into small slot, remove bolt inside agitator with socket wrench and long extension, pull agitator straight up off shaft, place agitator on floor, with feet holding bottom half pull top half apart from bottom half by pulling straight up, note direction of o
... Read more
ld cogs remove and replace with new, reassemble
Read less
Was this instruction helpful to you?
Thank you for voting!
- Customer:
- shawn from la jolla, CA
- Parts Used:
- 285809
- Difficulty Level:
- Easy
- Total Repair Time:
- 15 - 30 mins
- Tools:
- Screw drivers, Socket set
Dog ears worn down; upper agitator not moving
Pulled off the dispenser. Used socket set to remove bolt. Removed entire agitator out of washer. Placed both feet on bottom of agitator and then pulled up on the upper agitator. It took some muscle due to the years of washer use. I used a flat-head screwdriver to weaken the plastic clips holding down the old bearing-driven cam. Once
... Read more
I got the upper agitator off, the guts were easy to pull out. Then I just re-assembled with the 3 new parts (the Cam Driven, the Dog Ears, and the Bearing-Driven Cam).
Read less
Was this instruction helpful to you?
Thank you for voting!