


Models
>
RAB5232EQ1
RAB5232EQ1 Roper Washer
Jump to:
Find Part by Name
Keep searches simple, eg. "belt" or "pump".
Diagrams for RAB5232EQ1
Viewing 10 of 10


Keep searches simple, eg. "belt" or "pump".

$27.87
This is an OEM direct drive motor coupling, which provides a cushioned connection between the transmission and the motor shaft. This is the newer version of this part, made with new metal sleeves for ...
In Stock
Order within the next 6 hrs and your part ships today!

$48.76
The direct drive water pump is used in washing machines that do not have belts, to remove water from the tub during the drain cycle. It is located on the motor and attached by two clips. The drain pum...
In Stock
Order within the next 6 hrs and your part ships today!

$8.00
This suspension spring is a genuine OEM replacement part for a variety of washers and washer-dryer combos. The primary purpose of the suspension spring is to support the outer tub and keep the tub ste...
In Stock
Order within the next 6 hrs and your part ships today!

$52.86
The lid switch is a part of the washing machine that is found mounted to the underside of the cabinet top panel. This genuine OEM part is also known as a washer lid switch, a lid switch assembly, or a...
In Stock
Order within the next 6 hrs and your part ships today!

There are many symptoms that may indicate an issue with your water inlet valve. These can include your washer not filling with water, it will not stop filling, the washer is leaking, or it is both fil...
In Stock
Order within the next 6 hrs and your part ships today!

$27.58
This is a genuine OEM replacement clutch assembly for your washing machine. A clutch assembly, also known as a clutch or a washer clutch, is responsible for spinning the tub during the spin cycle. If ...
In Stock
Order within the next 6 hrs and your part ships today!

$7.04
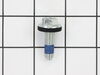
This bolt is a genuine OEM replacement part, used to secure the agitator in your washing machine. Overtime the bolt can become worn out due to the vibrations of the washer, and will need to be replace...
In Stock
Order within the next 6 hrs and your part ships today!

$7.04
This tub spring is a genuine OEM replacement part for your washing machine and is sold individually. There are other names that the tub spring goes by, such as the suspension spring, balance spring, o...
In Stock
Order within the next 6 hrs and your part ships today!

In Stock
Order within the next 6 hrs and your part ships today!

$5.42
This is a multi-use screw and can be used on a variety of appliances. The measurements of the screw are: 8/18 x 3/8. *Please note: the screw is sold individually. Refer to the manual provided by the m...
In Stock
Order within the next 6 hrs and your part ships today!

$5.76
Also known as Main Outer Tub Seal. This part helps to prevent leaking from the bottom of the tub.
In Stock
Order within the next 6 hrs and your part ships today!

$8.04
This hose clamp extends from half an inch to an inch in diameter. It is made entirely of metal and is intended for use with Maytag brand washing machines.
In Stock
Order within the next 6 hrs and your part ships today!
Questions and Answers
We're sorry, but our Q&A experts are temporarily unavailable.
Please check back later if you still haven't found the answer you need.
Common Problems and Symptoms for RAB5232EQ1
Viewing 16 of 16Leaking
Fixed by these parts


How to fix it
Will not agitate
Fixed by these parts


How to fix it
Will not drain
Fixed by these parts

How to fix it
Spins slowly
Fixed by these parts

How to fix it
No hot or cold water
Fixed by these parts

How to fix it
Burning smell
Fixed by these parts

How to fix it
Will Not Start
Fixed by these parts

How to fix it
Spinning Issues
Fixed by these parts
How to fix it
Shaking and Moving
Fixed by these parts


How to fix it
Leaks water
Fixed by these parts
How to fix it
Does not dispense fabric softener or detergent
Fixed by these parts

How to fix it
Marks left on clothes
Fixed by these parts

How to fix it
Water Filling Issues
Fixed by these parts
How to fix it
Noisy
Fixed by these parts
How to fix it
Touchpad does not respond
Fixed by these parts
How to fix it
Lid or door won’t close
Fixed by these parts

How to fix it


Keep searches simple. Use keywords, e.g. "leaking", "pump", "broken" or "fit".
- Customer:
- Jeff from Wayne, NJ
- Parts Used:
- 285753A
- Difficulty Level:
- Easy
- Total Repair Time:
- 30 - 60 mins
- Tools:
- Pliers, Screw drivers, Socket set
No movement from Basket & agitator
The job looked intimidating but turned out to be very easy.
First take off the water pump by removing the two clips that hold it in place. Place a shallow pan under the pump to catch the water that is in the pump and hoses. Open the hose clamps with a pair of pliers or channel locks (better) and slide the hoses off of the water pum ... Read more p.
The motor comes off next. Unplug the electrical connector from the motor and two wires from the capacitor. Remove the two screws holding the clamps in place and then pop off the two clamps. You will need to hold up the motor with one hand while you remove the clamps or it will fall to the floor once the clamps are removed.
One piece of the coupling assemble will be attached to the motor and the other will be attached to the gearcase drive shaft. If you want to clean up the mess created by the shredded rubber center piece of the coupling assembly you will have to take off the motor mounting plate. It is held on by two bolts and removing it makes installing the coupling easier but probably not necessary.
Push the back half of the coupling on to the gearcase drive shaft until the shaft is flush with the face of the coupling. Install the new rubber center piece on to the coupling then re-install the motor mounting plate. Install the other half of the coupling on to the motor shaft and lift the motor up to the coupling. You have to rotate the motor shaft by spinning the fan blades until the coupling lines up so you can slide it into the other half of the coupling. Then just reattach the motor, connectors and water pump in the reverse order of disassembly.
Read less
Was this instruction helpful to you?
Thank you for voting!
- Customer:
- RICHARD from PHILA, PA
- Parts Used:
- WPW10250667, WP3363394, WP3362952
- Difficulty Level:
- Really Easy
- Total Repair Time:
- 15 - 30 mins
- Tools:
- Nutdriver, Screw drivers, Socket set, Wrench set
Replace Water Pump Coupling
Removed casing tip over washer disconnected water pump. Disconnected motor then replace coupling then reassemble motor then replaced water pump.
Was this instruction helpful to you?
Thank you for voting!
Water pump leaking when machine used.
The hardest part of this job was pulling the machine away from the wall so the hoses could be disconnected and the machine flipped onto it's back. Putting the machine on it's back does two things. It drains the water left in the bottom of the tub so it won't pour out onto the motor when the old pump is removed, and gives the necessary a
... Read more
ccess to the pump. Once the machine is on it's back you remove the hose clamps with a pair of pliers and disconnect the hoses. The pump is secured to the motor with a pair of spring steel retaining clips which are easily popped off by hand. Once the clips are removed, the pump is in your hand. Put the new pump in place, replace the retaining clips and hoses, and you're done. This has to have been the easiest repair I've ever done. I wish cleaning gutters was this easy.
Read less
Was this instruction helpful to you?
Thank you for voting!