


Models
>
RT21DKXGN00
RT21DKXGN00 Roper Refrigerator
Jump to:
Find Part by Name
Keep searches simple, eg. "belt" or "pump".
Diagrams for RT21DKXGN00
Viewing 5 of 5


Keep searches simple, eg. "belt" or "pump".

$11.73
This is a genuine OEM 40-Watt replacement light bulb that is compatible with various types of appliances. It has a frosted glass bulb with a standard metal socket base, making it easy to screw and uns...
In Stock
Order within the next 12 hrs and your part ships today!

$116.17
Replacing a broken crisper drawer in your refrigerator is a simple repair that does not require any tools. Simply remove any items from the damaged drawer, and remove the drawer from the fridge. The w...
In Stock
Order within the next 12 hrs and your part ships today!

$34.61
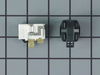
The defrost timer works on a predetermined schedule, to alternate between the cooling cycle and the defrost heater in your freezer. When the heating circuit is activated, it melts any ice that has for...
In Stock
Order within the next 12 hrs and your part ships today!

In Stock
Order within the next 12 hrs and your part ships today!

$45.20
This kit includes both upper and lower door handle end caps for both freezer and fresh food door handles. This is only available in chrome. All other colors are discontinued. Handle is NOT included....
In Stock
Order within the next 12 hrs and your part ships today!

$42.49
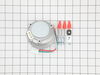
This clip-on thermostat will sense the temperature increase in the evaporator during the defrost cycle and will cycle the defrost heater off after the ice or frost is melted.
In Stock
Order within the next 12 hrs and your part ships today!

In Stock
Order within the next 12 hrs and your part ships today!

In Stock
Order within the next 12 hrs and your part ships today!

$8.00
This 18 ml bottle of white appliance touch-up paint is used to cover scratches or marks on your appliance. The white touch-up paint can be used on refrigerators, microwaves, ranges, clothes dryers, an...
In Stock
Order within the next 12 hrs and your part ships today!

In Stock
Order within the next 12 hrs and your part ships today!

In Stock
Order within the next 12 hrs and your part ships today!

In Stock
Order within the next 12 hrs and your part ships today!
Questions and Answers
We're sorry, but our Q&A experts are temporarily unavailable.
Please check back later if you still haven't found the answer you need.
Common Problems and Symptoms for RT21DKXGN00
Viewing 17 of 17Light not working
Fixed by these parts

How to fix it
Fridge too warm
Fixed by these parts


How to fix it
Freezer not defrosting
Fixed by these parts

How to fix it
Leaking
Fixed by these parts
How to fix it
Door won’t open or close
Fixed by these parts


How to fix it
Freezer section too warm
Fixed by these parts
How to fix it
Noisy
Fixed by these parts


How to fix it
Will Not Start
Fixed by these parts
How to fix it
Fridge and Freezer are too warm
Fixed by these parts
How to fix it
Frost buildup
Fixed by these parts
How to fix it
Fridge runs too long
Fixed by these parts
How to fix it
Fridge too cold
Fixed by these parts

How to fix it
Freezer too cold
Fixed by these parts
How to fix it
Too warm
Fixed by these parts
How to fix it
Door Sweating
Fixed by these parts
How to fix it
Ice maker not making ice
Fixed by these parts

How to fix it
Won’t start
Fixed by these parts
How to fix it


Keep searches simple. Use keywords, e.g. "leaking", "pump", "broken" or "fit".
The frost free feature of the freezer was freezing over with ice and cooling coils were being insulated with thickening frost which caused the cooling air to rise in temperature from -5 degrees to 20 degrees.
I troubleshot the problem by reading the electrical schematic and concluding the heating elements (defrost cables) were either defective or the bi-metal temp sensor was open. When closed the temp sensor completes the circuit for the current to flow through the heaters to defrost the cooling coils every 8 hours and then when the bimetal o
... Read more
pens at 55 degrees the circuit is open and the coils are cooled because the refridgeration motor is in run mode. A timer between the motor and heater elements also was defective. The timer controls the cooling period and the defrost period. I ohmed out each part according to the spec sheet of normal resistance of parts and thus the bimetal and timer were defective. I gather a surge of some duration and amplitude affected these parts because a storm 24 hours prior to refridgerator problem had passsed through the area and the AC electrical power had oscillated several times during that event. I used hand tools to do the repair. If you are not mechanically inclined a step by step proceedure would be moot. It is a matter of disassembly and assembly paying close attention to fragile parts.
Read less
Was this instruction helpful to you?
Thank you for voting!
We were getting ice forming in the freezer compartment and water in the frig compartment
A. remove food from freezer and store in cooler etc.
B. turn off frig with dial in main compartment, then pull frig out away from wall and unplug and remove the cover ( It is located at the bottom of the frig and may be cardboard and contains a handfull of 1/4" screws) exposing the compressor and drain tube (this is a good time to ... Read more vacume the compressor and coil area)
c. Take false back off from freezer by removing two 1/4 inch screws.
Next,
1. we made sure that the drain tube that runs down to a drain pan near the evaporator coil was clear, we did this by using a small aount of rock salt to speed up the melting of the ice then poured small amounts of hot water (boiling into the drain hole and soon the water flowed down the tube and into the pan below.
2. We then pushed a #12 standed electrical wire (with its end stripped back 1-1/2" then folding the strands back to create a broom) down the tube to the pan to push out any debree that may be present i.e. tin foil plastic bag particles, food chunks etc.
Making sure that this drain tube is clear is the first thing that could be causing the ice build up and water in the lower compartment!
However, I performed this several times and didn't change the problem so I chose to change the parts associated with defrost:
1. defrost heater, which is very easy to change. it is mostly plug and play but does require a pair of needle nose pliers to open a couple of metal fins to remove heater from its mounts, just be gentle with the process.
2. defrost thermostat, which is also very easy to change (Simply pull it off of a copper tube) but requires you to cut two wires near the old part and wire nut the new part wires to the remaining original wires, I added some anti oxident to the wires inside the wire nut to prevent a bad connection from developing do to moisture in this area (You can buy wire nuts with this already inside them, do this)and I taped the wire nut with a few inches of ELECTRICAL TAPE CLOSING OFF THE OPENING OF THE WIRE NUT.
You can then put his cabinet back together!
3. I also decided to change the defrost timer which is located inside a cover where the frig temperture setting dial is located. It is held to this cover by two phillips screws the cover is held in place by one 1/4" screw.
once you have the cover off and the defrost timer unscrewed you must remove a plug from the timer!
Now if you got the exact part you simply reinstall the defrost timer plug in the same postion on the new timer and screw the timer back onto its mount etc. However you may need to determine if the new timer is in the "DEFROST" position and you will need to take it out of that position by I assume rotating the timer mechanism (Ask a tech person about this)!!!!!!!!!
Then with all that done plug your frig vack in reposition it turn it on and be proud of yourself.
Now, if you recieved the timer I did it may look the same as the old one, but it may contain a black wire!!!
You will need to know which type of defrost timer application you frig uses:
1. Continuous run
2. version 1 Cumulative compressor run.
or
3. version 2 Cumulative compressor run.
I found a wiring diagram folded up and stored in the grill in the bottom of the front of the frig that helped me determine this. you will need to be able to read a wiring diagram but I found this situation to be simply a matter of matching examples of pictures (line diagrams). It is important though as you must determine which timer application your frig has because the black wire must be placed on a certain terminal for proper operation.
I replaced a three parts and may have, through trouble shooting, been able to save some money by not replacing all these parts. However , I found that when I went for guidance on trouble shooting that i.e. with the heater that ohmic values of the old part may be near the new part that it may still not be conclusive!? so for a hundred bucks my frig may last 5-10
Read less
Was this instruction helpful to you?
Thank you for voting!
- Customer:
- Clint from Rayville, MO
- Parts Used:
- W11384469
- Difficulty Level:
- Really Easy
- Total Repair Time:
- Less than 15 mins
- Tools:
- Screw drivers
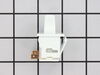
Lights inside refrigerator not working
I used a flat-head screwdriver to pop out the old light rocker switch. Then, I unplugged the wires, plugged them into the new light rocker switch, and then popped the new switch into the hole. That's it! Lights began working again.
Was this instruction helpful to you?
Thank you for voting!