


Models
>
RT12VKYEW00
RT12VKYEW00 Roper Refrigerator
Jump to:
Find Part by Name
Keep searches simple, eg. "belt" or "pump".
Diagrams for RT12VKYEW00
Viewing 5 of 5


Keep searches simple, eg. "belt" or "pump".

In Stock

$8.00
This 18 ml bottle of white appliance touch-up paint is used to cover scratches or marks on your appliance. The white touch-up paint can be used on refrigerators, microwaves, ranges, clothes dryers, an...
In Stock

$105.36
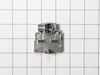
This part is both the start relay and the overload. The start relay boosts the compressor, and then shuts off as soon as the motor gets up to speed and the overload provides extra protection against e...
In Stock

$11.55
This fourteen cube ice cube tray is eleven inches long. It is all white in color and is made entirely of plastic.
In Stock

In Stock

In Stock

$10.70
This is an OEM part sourced directly from the manufacturer. This leveling leg is commonly used with refrigerators, dryers, freezers, ranges, cooktops, and microwaves. This leveling leg ensure that you...
In Stock

In Stock

In Stock

$71.51
This part provides added protection for the compressor motor because it protects against excessive current and excessive temperature use.
In Stock

In Stock

$505.19
This is the mechanics (motor/engine) of the cooling system. It kicks in whenever the thermostat demands cooling. ***NOTE: This part needs to be installed by a trained professional in appliance repa...
In Stock
Questions and Answers
We're sorry, but our Q&A experts are temporarily unavailable.
Please check back later if you still haven't found the answer you need.
Common Problems and Symptoms for RT12VKYEW00
Viewing 6 of 6Light not working
Fixed by these parts
How to fix it
Will Not Start
Fixed by these parts
How to fix it
Fridge too warm
Fixed by these parts
How to fix it
Freezer section too warm
Fixed by these parts
How to fix it
Clicking sound
Fixed by these parts
How to fix it
Fridge and Freezer are too warm
Fixed by these parts
How to fix it

Keep searches simple. Use keywords, e.g. "leaking", "pump", "broken" or "fit".
- Customer:
- Clint from Rayville, MO
- Parts Used:
- W11384469
- Difficulty Level:
- Really Easy
- Total Repair Time:
- Less than 15 mins
- Tools:
- Screw drivers
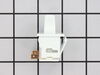
Lights inside refrigerator not working
I used a flat-head screwdriver to pop out the old light rocker switch. Then, I unplugged the wires, plugged them into the new light rocker switch, and then popped the new switch into the hole. That's it! Lights began working again.
Was this instruction helpful to you?
Thank you for voting!
- Customer:
- Anna from Lincoln, RI
- Parts Used:
- WPW10189190
- Difficulty Level:
- Easy
- Total Repair Time:
- Less than 15 mins
- Tools:
- Screw drivers
Our Refrigerator and freezer stopped working
I had read on a fix it site that the start device for the compressor on this particular model was known to fail after 3-5 years. When we received the part it looked like something that just plugged into the compressor. My husband unscrewed the panel in the back of the fridge and saw the part on the compressor. He first removed the thre
... Read more
e wires that it was connected to, and the wires were inside a plug so all he had to do was remove the plug from the start device. He then removed the old start device from the compressor. Plugged in the wire plug into the new start device, and pushed in the new start device into the compressor. There was also another black part plugged into the old start device that he plugged inot the new start device that connected to the compressor. Our freezer and refrigerator starting working. Within a couple of hours our freezer had made ice.
Read less
Was this instruction helpful to you?
Thank you for voting!
- Customer:
- James Richard from St. Cloud, MN
- Parts Used:
- W11384469
- Difficulty Level:
- Easy
- Total Repair Time:
- Less than 15 mins
- Tools:
- Socket set
Light Switch broke
An easy job for smaller hands. Removed the two bolts holding the light cover. Removed two electrical connections from the old switch by pinching the retaining clip,removed the switch, snapped in the new one and re-attached the connectors. Your online illustrations helped me to know that the plastic housing for the light switch would only
... Read more
swing down so far and was not intended to be removed. Saved me from breaking that plastic cover's tabs. This home repair saved me more than 5 times the cost of hiring a professional to do it. Very happy homeowner.
Read less
Was this instruction helpful to you?
Thank you for voting!