


Models
>
IKS203304
IKS203304 Inglis Refrigerator
Jump to:
Find Part by Name
Keep searches simple, eg. "belt" or "pump".
Diagrams for IKS203304
Viewing 8 of 8


Manuals & Guides for IKS203304
Click to downloadKeep searches simple, eg. "belt" or "pump".

$11.73
This is a genuine OEM 40-Watt replacement light bulb that is compatible with various types of appliances. It has a frosted glass bulb with a standard metal socket base, making it easy to screw and uns...
In Stock

$7.71
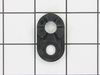
The lower door closing cam raises the door to keep it from touching the refrigerator liner when the door is closed. It fits both the left and right side of the refrigerator door. The most common reaso...
In Stock

This clear convertible meat drawer is for the lower part of the refrigerator. It has an air duct that allows cold air to flow into the drawer from the freezer. It can be used to store meats and vegeta...
In Stock

$10.56
This is a refrigerator or freezer lower door closing cam. This part includes the door cam only, but you will need a new mounting screw to complete this repair, and it is sold separately. Door cams are...
In Stock

$111.90
The crisper pan helps to keep fruits and vegetables fresh by storing them at an ideal humidity level and at a controlled temperature. If the crisper drawer is not opening or closing properly, it may b...
In Stock

$34.61
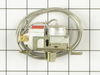
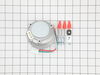
The defrost timer works on a predetermined schedule, to alternate between the cooling cycle and the defrost heater in your freezer. When the heating circuit is activated, it melts any ice that has for...
In Stock

In Stock

$46.59
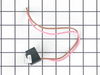
The bi-metal defrost thermostat is attached to the evaporator, and its purpose is to protect the evaporator from overheating when the defrost cycle is running. If there is frost building up in your fr...
In Stock

$96.92
This genuine OEM part is a thermostat assembly for your fridge. This part acts as a sensor to detect temperature changes in the evaporator. When the defrost cycle is running and the ice has melted, th...
In Stock

$20.79
This is a screw and it is made for multiple appliances in your home. This model is called a sheet metal screw because it has sharp points, and the threads are closer together. This screw is designed t...
In Stock

$138.21
This part is also known as a shelf frame. This drawer cover is for refrigerators.
Drawer cover has rail brackets under the cover that hold the drawer and allow the drawer to slide in and out on th...
In Stock

$66.72
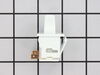
This part helps the compressor kick on and off while maintaining a constant temperature to keep things frozen in your freezer.
In Stock
Questions and Answers
We're sorry, but our Q&A experts are temporarily unavailable.
Please check back later if you still haven't found the answer you need.
Common Problems and Symptoms for IKS203304
Viewing 19 of 19Door won’t open or close
Fixed by these parts


How to fix it
Fridge too warm
Fixed by these parts

How to fix it
Light not working
Fixed by these parts


How to fix it
Will Not Start
Fixed by these parts

How to fix it
Freezer section too warm
Fixed by these parts
How to fix it
Noisy
Fixed by these parts


How to fix it
Freezer not defrosting
Fixed by these parts
How to fix it
Clicking sound
Fixed by these parts
How to fix it
Fridge and Freezer are too warm
Fixed by these parts
How to fix it
Leaking
Fixed by these parts


How to fix it
Fridge too cold
Fixed by these parts
How to fix it
Fridge runs too long
Fixed by these parts
How to fix it
Freezer too cold
Fixed by these parts
How to fix it
Door Sweating
Fixed by these parts
How to fix it
Ice maker not making ice
Fixed by these parts

How to fix it
Frost buildup
Fixed by these parts
How to fix it
Too warm
Fixed by these parts
How to fix it
Ice maker won’t dispense ice
Fixed by these parts
How to fix it
Won’t start
Fixed by these parts
How to fix it


Keep searches simple. Use keywords, e.g. "leaking", "pump", "broken" or "fit".
- Customer:
- Norbert from Sugar Land, TX
- Parts Used:
- WP2182179, WPW10329686
- Difficulty Level:
- Really Easy
- Total Repair Time:
- 15 - 30 mins
- Tools:
- Nutdriver, Pliers, Screw drivers
Refigerator door was not closing all the way if not pushed shut.
Remove the top hinge cover. Removed the top hinge support. Lifted the door from the bottom support. Old door cams were worn completly flat. Replaced the lower door cam and closing cam use a little vasalene for lubricant on the cam surfaces. Placed the door back on the lower hinge support. Replaced the top hinge support. Door is cl
... Read more
osing great now.
Thanks for the quick part deliver.
Thanks for the quick part deliver.
Read less
Was this instruction helpful to you?
Thank you for voting!
- Customer:
- Steve earney from Brooks, GA
- Parts Used:
- WP2198202
- Difficulty Level:
- Really Easy
- Total Repair Time:
- 30 - 60 mins
- Tools:
- Nutdriver, Pliers, Screw drivers
inconsistent compressor and condensor fan operation
Compressor start relay would cycle several times before compressor would come on. Replaced start relay and defrost timer assy. Operated more consistently however not completely reliable. Ice would begin to melt. Noticed that if you would cycle the temperature control the compressor would start again and operate for several hours then n
... Read more
ot cycle again. Jumpered temp control and operation was continuous and reliable. Replaced cold control thermostat. Operation now normal. Suspect high resistance in switch caused start relay and timer contacts to arc. Small amount of carbon noticed under temp control...
Read less
Was this instruction helpful to you?
Thank you for voting!
- Customer:
- Cathy from Winter Park, FL
- Parts Used:
- WPW10225581
- Difficulty Level:
- A Bit Difficult
- Total Repair Time:
- 15 - 30 mins
- Tools:
- Nutdriver
Fridge was getting too warm, ice buildup on coils.
WARNING: REPLACING THIS PART REQUIRES CUTTING AND SPLICING ELECTRICAL WIRES. RISK OF ELECTRICAL SHOCK OR FIRE. DO NOT ATTEMPT THIS REPAIR IF YOU ARE NOT EXPERIENCED WITH ELECTRICAL WIRING.
Part Info:
The bi-metal strip is clipped onto the evaporator coils and is designed to regulate the defrost coil temperature. If it is n ... Read more ot functioning properly you may notice ice buildup preventing air flow (and preventing proper refrigeration), or more rarely the freezer side may get too warm during the defrost cycle.
Materials:
* Replacement bi-metal strip
* Wire cutters
* Wire strippers
* Wire nuts
* Electrical tape
* 10MM socket
Steps:
1: UNPLUG THE FRIDGE! If there is ice buildup, wait until the ice has melted. A box fan blowing at the ice will help melt it more quickly.
2: Remove the panel covering the evaporator coils. It's located inside the fridge, on the freezer side.
3: Un-clip the bi-metal strip from the evaporator coils.
4: Unplug the wires from the evaporator fan, defrost coil and bi-metal strip, then disconnect the main connector that is plugged into the rear wall.
5: Clip both wires to the old ( bad ) bi-metal strip. Cut close to the casing of the bi-metal strip so there are long wires to splice onto.
6: Strip 1/4 to 1/2 inches of insulation off of the ends of the wires ( depending on the size of the wire-nuts you use). Twist the bare wires slightly to prevent fraying.
7: Do the same for the ends of the wires on the (new) bi-metal strip.
8: Take the ends of the wires belonging to the (new) bi-metal strip and the wires coming from the main plug. Take the like-colored wires, and twist the bare metal ends together.
9: Twist on wire nuts, for both sets of wires. Make sure they are snug, with no bare wire showing.
10: Tape over the wire nuts with electrical tape. Tape over the wires nuts in a spiral fashion, completely covering the nut and both wires that are now spliced together. This will prevent accidental shorting.
11: Plug the main plug back into the rear wall of the fridge. Also re-connect the connectors to the evaporator fan and defrost coil. Make sure the clips on the connectors are snug to ensure a good connection.
12: Clip the new bi-metal strip onto the coils, in the same spot as before. ( Usually just after the small incoming copper tubing that connects to the coils, known as the expansion valve. That is usually the coldest spot on the coils during operation).
13: Replace the panel that covers the coils.
14: Plug the fridge back in... Now you fridge should defrost correctly. If it does not, your defrost coil could be burned out, or the control board could be faulty.
Read less
Was this instruction helpful to you?
Thank you for voting!