


Models
>
CFEF3053TSA
CFEF3053TSA Frigidaire
Jump to:
Find Part by Name
Keep searches simple, eg. "belt" or "pump".
Diagrams for CFEF3053TSA
Viewing 5 of 5


Manuals & Guides for CFEF3053TSA
Click to downloadKeep searches simple, eg. "belt" or "pump".

$23.10
This genuine OEM bake element is located on the bottom of the oven cavity to supply heat for baking. The approximate size is 19-1/2 inches wide by 18-1/2 inches long and has 3-1/2 inch inserts. The el...
In Stock

$43.86
The infinite burner switch is used to control the temperature of the burner element on your stove top. This model is for the larger, eight-inch element. If your burner is not heating up or has uneven ...
In Stock

In Stock

$47.25
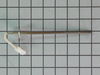
If your oven has little to no heat, is not heating evenly, or is reaching too high a temperature, there may be a problem with your oven probe. This probe, also known as an oven temperature sensor or a...
In Stock

This switch controls the stove top surface burner.
In Stock

$121.67
This is a replacement rack for your oven. The oven rack fits into grooves on the side of the oven wall, and acts as a shelf that you can place food items on when you want to cook them in the oven. Thi...
In Stock

$9.37
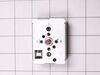
Terminal blocks (also called terminal boards or strips) provide a convenient means of connecting individual electrical wires.
In Stock

$139.23
This is used as the "floor" of the oven cabinet.
Note: Does not come with rivets or screws. Must be purchased locally.
In Stock

$10.90
This is a light bulb lens, and it is made for your oven. This part protects the light bulb inside your oven by covering it. The lens is made of glass, and has a 3-inch diameter. Before making this rep...
In Stock

$164.78
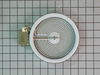
This part is the heatsource. This surface element is for ranges.
Surface element supplies the heat to a cooking area on top of the range.
Unplug the range or shut off the house circuit breaker ...
In Stock

In Stock

In Stock
Questions and Answers
We're sorry, but our Q&A experts are temporarily unavailable.
Please check back later if you still haven't found the answer you need.
Common Problems and Symptoms for CFEF3053TSA
Viewing 11 of 11Element will not heat
Fixed by these parts

How to fix it
Little to no heat when baking
Fixed by these parts

How to fix it
Oven not heating evenly
Fixed by these parts
How to fix it
Oven is too hot
Fixed by these parts
How to fix it
Will Not Start
Fixed by these parts
How to fix it
Little to no heat when broiling
Fixed by these parts

How to fix it
Door won’t close
Fixed by these parts


How to fix it
Touchpad does not respond
Fixed by these parts

How to fix it
Door won’t open after self cleaning cycle
Fixed by these parts

How to fix it
Will not program
Fixed by these parts
How to fix it
Gas igniter glows, but will not light
Fixed by these parts
How to fix it


Keep searches simple. Use keywords, e.g. "leaking", "pump", "broken" or "fit".
- Customer:
- David from Shawnee, KS
- Parts Used:
- 316075103
- Difficulty Level:
- Really Easy
- Total Repair Time:
- Less than 15 mins
- Tools:
- Screw drivers
Oven woudn't heat
1. Removed two screws, pulled out the element, voltage tested the element and determined it was an open circuit (bad element).
2. Ordered the part from partselect.com
3. Disconnected element, connected the new one, and screwed it back in.
2. Ordered the part from partselect.com
3. Disconnected element, connected the new one, and screwed it back in.
Was this instruction helpful to you?
Thank you for voting!
- Customer:
- Michael from Green Bay, WI
- Parts Used:
- 316075103
- Difficulty Level:
- Really Easy
- Total Repair Time:
- Less than 15 mins
- Tools:
- Nutdriver
Element cracked in two pieces
Shut off circuit breaker to stove and collected the tool from the basement. Turned on flashlight. Unscrewed the two hex nuts from the old element/back of the oven. Slid the old element prongs out of the back, exposing the connecting wires. Pulled the connecting wires off of the old element, carefully, so that the connections wouldn
... Read more
't come off of the wires. Threw the old element pieces in the garbage. Connected the new element to the connecting wires and re-fastened the hex nuts. My husband had wanted to call the repair man, but it didn't look too difficult, so I decided to try it on my own. Boy was he surprised when I fixed it, and for a fraction of the cost of hiring a repairman! Ladies, we can do this ourselves!!! :) Thank you for being there for us to order our part from, Parts Select, we had our new part in less than 24 hours, so the shipping was blazing fast!!! Keep up the good work!!! :)
Read less
Was this instruction helpful to you?
Thank you for voting!
- Customer:
- jack from chambersburg, PA
- Parts Used:
- 316075103
- Difficulty Level:
- Really Easy
- Total Repair Time:
- Less than 15 mins
- Tools:
- Screw drivers
oven did not heat
removed screws pulled element out. removed wire from old element replaced with new element.very easy
Was this instruction helpful to you?
Thank you for voting!