


Models
>
DE570ADD1
DE570ADD1 Westinghouse Dryer
Jump to:
Find Part by Name
Keep searches simple, eg. "belt" or "pump".
Keep searches simple, eg. "belt" or "pump".

$6.33
The drum support bearing is an authentic OEM replacement part for your dryer. The bearing is used to support the drum and allow it to rotate smoothly and quietly. If your dryer is excessively noisy wh...
In Stock

In Stock

$9.37
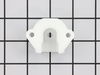
Terminal blocks (also called terminal boards or strips) provide a convenient means of connecting individual electrical wires.
In Stock

In Stock

Use this idler pulley assembly with gas or electric clothes dryer that has a flat dryer belt.
***Please NOTE: This part has been redesigned by the manufacturer and may not fit your appliance.
No Longer Available

This dryer lint screen and frame is used for Frigidaire/WCI brand electric and gas dryers. The filter is 14-1/4 inches wide and comes with a bezel frame and mounting screws.
No Longer Available

Special Order

Special Order
Special Order
Questions and Answers
We're sorry, but our Q&A experts are temporarily unavailable.
Please check back later if you still haven't found the answer you need.
Common Problems and Symptoms for DE570ADD1
Viewing 9 of 9Noisy
Fixed by these parts


How to fix it
Door won’t close
Fixed by these parts

How to fix it
Little to no heat when baking
Fixed by these parts

How to fix it
Will Not Start
Fixed by these parts
How to fix it
Element will not heat
Fixed by these parts
How to fix it
Marks left on clothes
Fixed by these parts
How to fix it
Oven not heating evenly
Fixed by these parts
How to fix it
Little to no heat when broiling
Fixed by these parts
How to fix it
Lid or door won’t close
Fixed by these parts
How to fix it


Keep searches simple. Use keywords, e.g. "leaking", "pump", "broken" or "fit".
- Customer:
- Dianne from Kansas City, MO
- Parts Used:
- 5366021400
- Difficulty Level:
- Really Easy
- Total Repair Time:
- Less than 15 mins
- Tools:
- Pliers, Screw drivers
Catch broke, door wouldn't stay closed.
Used a screwdriver to pop out broken piece. Used pliers to snap in new one.
Was this instruction helpful to you?
Thank you for voting!
- Customer:
- Timothy from Spring Valley, AL
- Parts Used:
- 5304409888
- Difficulty Level:
- Really Easy
- Total Repair Time:
- 15 - 30 mins
- Tools:
- Screw drivers, Socket set
Cord was not tightened enough by delivery crew.
PF alarm appeared on display. Noticed clicking when cord was moved. Had arced for some time and melted original block. New part slightly different. Only has 3 lugs, old one had six. Stack using washers provided. Take note of colors before disassembly. Use caution while working through access opening. The edges are sharp. Only tools neede
... Read more
d are phillips screwdriver, deep socket for lug nuts. Nut driver optional. Hope this is helpful.
Read less
Was this instruction helpful to you?
Thank you for voting!
- Customer:
- Tod from West Springfield, MA
- Parts Used:
- 5303281154
- Difficulty Level:
- A Bit Difficult
- Total Repair Time:
- 1- 2 hours
- Tools:
- Nutdriver, Screw drivers, Wrench set
Broken Dryer Belt
1st I pried the dryer top open then disconnected the two wires for the auto shut-off. Removed four nuts with driver that opens front and releases dryer barrel. Lifted front up a bit to remove from two lower tabs at bottom of unit and put aside.
I then slid the belt over the barrel noting the side up directions on the belt. On ... Read more the lower left on the back of unit I opened up the vented cover to reveal the motor pulley and belt tension pulley. I put the belt on the pulley and brought the belt tension pulley over the belt. I then aligned the belt to the proper point on the barrel and reattached the front being careful to center the barrel onto the rim that is built into the front. Take care to align all the tabs and shims in the correct order so that barrel rotates freely. Replace auto shut off wires to switch on inside of front and close top.
I then slid the belt over the barrel noting the side up directions on the belt. On ... Read more the lower left on the back of unit I opened up the vented cover to reveal the motor pulley and belt tension pulley. I put the belt on the pulley and brought the belt tension pulley over the belt. I then aligned the belt to the proper point on the barrel and reattached the front being careful to center the barrel onto the rim that is built into the front. Take care to align all the tabs and shims in the correct order so that barrel rotates freely. Replace auto shut off wires to switch on inside of front and close top.
Read less
Was this instruction helpful to you?
Thank you for voting!