


Models
>
MDB9000AWW
MDB9000AWW Maytag Dishwasher
Jump to:
Find Part by Name
Keep searches simple, eg. "belt" or "pump".
Diagrams for MDB9000AWW
Viewing 7 of 7


Keep searches simple, eg. "belt" or "pump".

$27.75
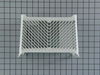
This is a genuine OEM replacement silverware basket for your dishwasher. It is gray in color and comes as an assembly with a hinged cover and a handle. The basket sits in the front of the bottom rack ...
In Stock

$12.46
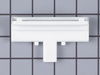
The rollers on the lower rack in your dishwasher allow the rack to smoothly roll in and out of the appliance. If a roller wheel has become damaged or broken off, it should be replaced so that the rack...
In Stock

$69.78
This door gasket can be installed by simply pressing it into the channel around the door. This dishwasher door gasket, or door seal, allows the dishwasher door to have an airtight seal when closing th...
In Stock

$11.14
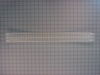
This dishrack clip is intended for use with dishwasher dishracks that have adjustable pegs. This clip is only about four inches long.
In Stock

$17.19
This upper dishwasher dishrack roller is just over an inch in diameter. It is all white in color and is made entirely of plastic.
In Stock

This dishrack guide rail stop is made of plastic and is gray in color. It is an inch and a half long.
In Stock

$379.66
NOTE: Per factory, this substituted part only has 6 wheels instead of 8 and NO longer comes with shelf rack.
In Stock

In Stock

This rack comes complete with four attached wheels and the rack may differ in appearance, but will function same as original part.
No Longer Available

In Stock

$8.04
This hose clamp extends from half an inch to an inch in diameter. It is made entirely of metal and is intended for use with Maytag brand washing machines.
In Stock

$11.06
Sold individually. It is recommended to change both tines at the same time.
In Stock
Questions and Answers
We're sorry, but our Q&A experts are temporarily unavailable.
Please check back later if you still haven't found the answer you need.
Common Problems and Symptoms for MDB9000AWW
Viewing 11 of 11Leaking
Fixed by these parts


How to fix it
Not cleaning dishes properly
Fixed by these parts


How to fix it
Door latch failure
Fixed by these parts


How to fix it
Will not dispense detergent
Fixed by these parts


How to fix it
Will not fill with water
Fixed by these parts


How to fix it
Will Not Start
Fixed by these parts
How to fix it
Noisy
Fixed by these parts


How to fix it
Not draining
Fixed by these parts

How to fix it
Door won’t close
Fixed by these parts

How to fix it
Not drying dishes properly
Fixed by these parts


How to fix it
Lid or door won’t close
Fixed by these parts


How to fix it


Keep searches simple. Use keywords, e.g. "leaking", "pump", "broken" or "fit".
- Customer:
- Tim from Ringgold, GA
- Parts Used:
- WP99001553, WP902894
- Difficulty Level:
- Easy
- Total Repair Time:
- 30 - 60 mins
- Tools:
- Nutdriver
Water dripping from right corner of door
Took out about 7 torx screws to remove the inner door liner. Discovered evidence of leak coming from the sop dispenser latch, and noticed the grommet had turned soft and was torn. The grommet is only about 1" square. Used nut driver to remove two screws to remove latch assembly. Slipped old grommet off and put new one on, and reattached t
... Read more
he latch. The foam seal at the bottom of the door looked worn, so we replaced it with weatherstripping from home improvement store. The main door seal was brittle, so we replaced it too - just grab an end and pull the old one out. The new one was installed by starting at one end and we just pushed it in place. We used a nut-driver to push it in - we were afraid a screwdriver might damage it. The new door seal required us to latch the door to get it to stay closed the fist couple of days, but now it has loosened up a bit and works as expected. And NO MORE LEAKS. Cost is much less than a new unit!
Read less
Was this instruction helpful to you?
Thank you for voting!
- Customer:
- Kathy from Lombard, IL
- Parts Used:
- WP903093
- Difficulty Level:
- Really Easy
- Total Repair Time:
- Less than 15 mins
- Tools:
- Pliers
Rack roller broke
I opened the end stop of the rack, replaced the roller, and put the end stop back on. I can't believe I paid the repairman the last time $125????? An he put in a regular screw that rusted and broke the roller. Took me 3 minutes! Thanks
Was this instruction helpful to you?
Thank you for voting!
- Customer:
- frank from kenmore, WA
- Parts Used:
- WPY912709
- Difficulty Level:
- Difficult
- Total Repair Time:
- 30 - 60 mins
The dish rack had two sets of adjustable tines that had never worked.
I ordered two clips just in case. Turns out I needed both of them. Since I hadn't seen the adjustable tines installed, it took some time to figure out how to put the assembly together.
For some reason I had the dishwasher for 7 years before it occurred to me to order the replacement parts. It's much more efficient to use wit ... Read more h the adjustable tines properly installed as I can load approximately 25% more plates than before.
For some reason I had the dishwasher for 7 years before it occurred to me to order the replacement parts. It's much more efficient to use wit ... Read more h the adjustable tines properly installed as I can load approximately 25% more plates than before.
Read less
Was this instruction helpful to you?
Thank you for voting!