Starting Seeds Indoors
Getting Ahead for Spring
As a gardener, you know that your kitchen windowsill is one of your greatest assets. It is brightly lit and warm, which comes in handy early in the year when gardeners want to get lots of seeds started, but it’s too cold to do it outside. Windowsills provide a sort of nursery, a much overlooked and easy-to-check spot where our most delicate seedlings can be nurtured and pampered through the most vulnerable time of their lives.
Which Seeds to Sow Indoors and Why
The seeds that most cry out to be sown indoors are the tender annuals. This includes vegetable plants such as tomatoes, zucchini, chilis, sweet peppers, eggplants, melons, and winter squash. For flowers, it’s plants like sunflower, zinnia, nicotiana, begonia, and amaranth. These are the glamour plants, both in vegetable and flower form. Tender annuals are worth the extra fuss because they bring color, gloss, and intense flavors to the garden.
Don’t underestimate the “extra fuss” part. “Tender” means that these plants will die if they are touched by frost. Unfortunately they also need to be sown early in the year, at a time when frosts could likely still occur; otherwise they will not have a long enough season in which to grow, flower, and sometimes fruit.
This is where the windowsill comes in: it is one way that we can fool plants into thinking that they are growing in a much warmer climate, one that is going to allow them to reach maturity. Most tender annuals should be sown about six weeks before the last expected frost date for your area, though chilies need longer.
While a windowsill is a useful spot for sowing seeds, it does have some problems, namely that its temperature can be a little inconsistent. Seeds germinate most readily in constant temperatures, and a windowsill can fluctuate between the relative cool of the daytime, the heat of the early evening – when central heating is on – and the cold of the night. You can give your seed sowing some extra help with the aid of a heated propagator.
A heated propagator is a small cabinet with a translucent cover that you plug into an electrical outlet. A mat at the base of the unit maintains a gentle, even heat. You place your potted seeds onto it and put the lid on top to keep them moist and warm. Most seeds find these conditions irresistible, and – whether sown into a seed tray or individual pots – will germinate in days, rather than in the weeks they would take on a windowsill. As soon as they have germinated, take them out of the propagator and place them on the windowsill to continue growing.
How to Care For Them as They Grow
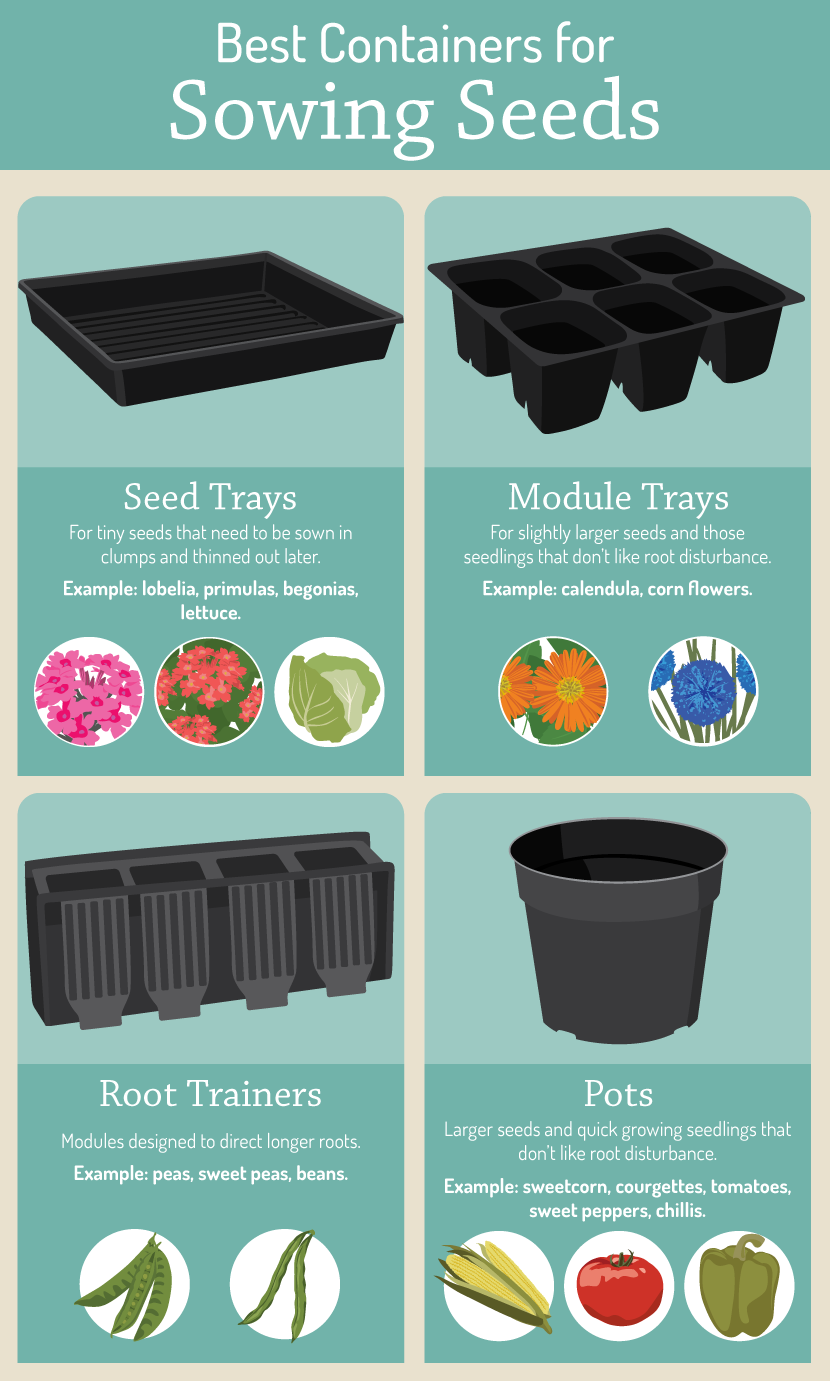
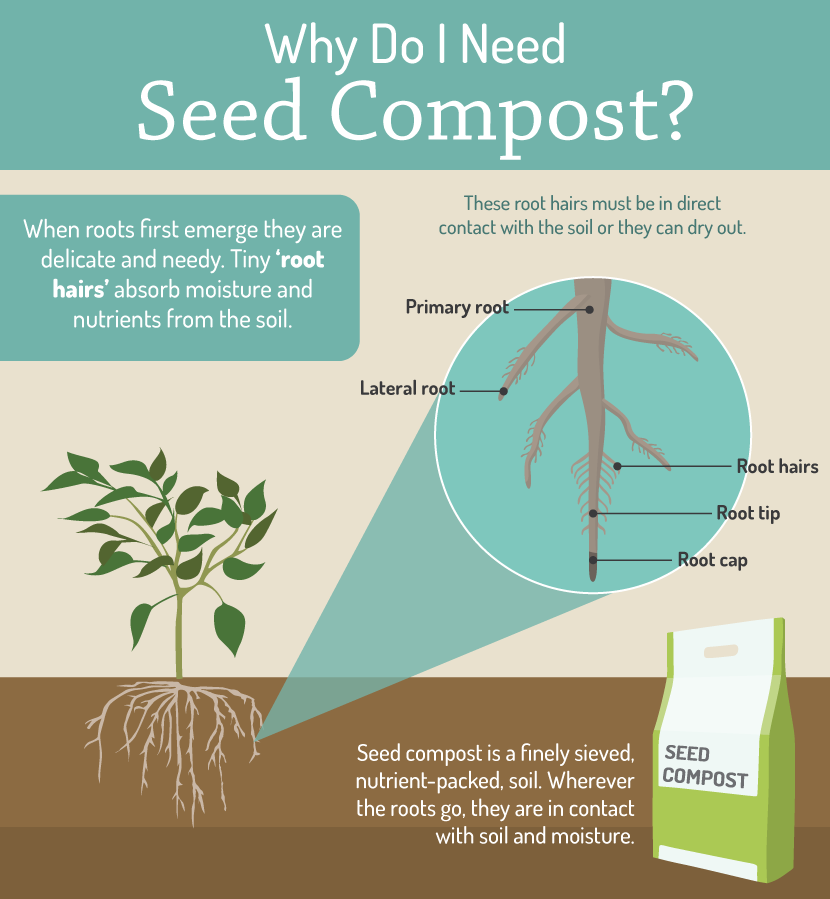
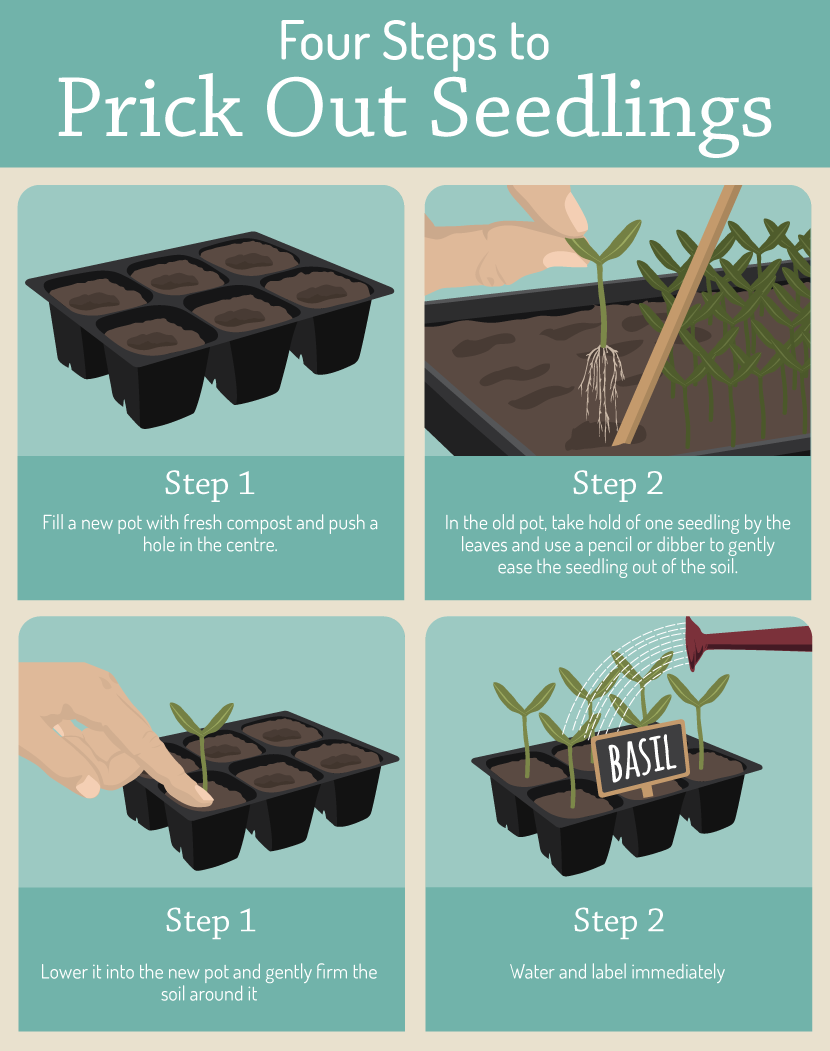
Seedlings need constant care and vigilance. They need to be kept watered, but not soaked, as too much moisture can give them fungal diseases. They also need to be regularly repotted. If you have sown into a seed tray or have sown several seeds into one pot you will soon find that your seedlings are jostling for space. At this point you will need to prick them out into their own individual pots.
Ease each one away from its neighbours with the help of the end of a pencil. Lift it into its own pot of fresh compost before gently settling the compost around the roots using your fingers, and then watering. As these individually potted plants grow you may need to repot them into larger pots again.
It is particularly likely that fast growers such as tomatoes, zucchini, and winter squash will need repotting several times before they are ready to go out into the ground. Chili plants respond to the size of pot they are in, rather than becoming obviously too large for their pots, as other plants do. This means they are easily overlooked when it comes to repotting, but if you don’t repot them they will barely grow, so make sure to do so regularly.
Even when placed right next to a window, seedlings can struggle for light. When this happens they get drawn up and leggy, and lean in one direction. There are a couple of things you can do to counteract this. Turn your seedlings frequently: this helps to strengthen the stems as they lean towards the light each time. Gently brush the tops of your seedlings with your hands a couple of times a day. This mimics the action of the breeze and helps to strengthen the stems as well.
How to Harden Them Off and Plant Them Out
There will come a time when your indoor plants are large, and the weather has warmed. We hope that these two things happen at roughly the same time. Once frosts have passed, the weather outside is still likely to be significantly colder than the temperature on your windowsill. Plants that are moved directly from the indoors to soil will suffer a shock and are likely to die; instead they need careful hardening off.
Hardening off is the process of acclimatizing your plants to cooler conditions. Start off by placing them in a greenhouse, if possible (if you don’t have one, just skip this stage). After a few days they can then come outside during the day, and be moved back in at night, and after a few days of this they can stay out all night too, but in a sheltered spot.
Plant them out into the garden or vegetable patch, or into pots, but cover them for a week or so with a cloche or a piece of horticultural fleece. Finally, remove this once the weather is reliably warm.
The delicate tender seedlings that you have nurtured indoors should now have successfully made their way to the great outdoors, and will be well on the path to producing beautiful and delicious flowers and fruit, come summer.
Embed the article on your site