


Models
>
ACO1840AW
ACO1840AW (PACO1840AW0) Amana Microwave
Jump to:
Find Part by Name
Keep searches simple, eg. "belt" or "pump".
Diagrams for ACO1840AW
Viewing 7 of 7


.gif "MISCELLAEOUS INFORMATION Diagram and Parts List for PACO1840AW0 Amana Microwave")

Keep searches simple, eg. "belt" or "pump".

$8.89
To access the exterior lightbulb, the bottom panel of the microwave will need to be removed. It is secured in place with screws, so will require a Philips screwdriver to remove it. Screw the new light...
In Stock

$17.14
This 25-watt light bulb is a genuine OEM replacement part for a variety of appliances. The 120-volt incandescent bulb has a screw-in base and is used to light up the appliance when the door is opened....
In Stock

This tray rotates in your microwave ensuring more even temperatures.
No Longer Available

$10.21
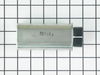
This is a ceramic fuse for a microwave. It is just over 1 inch long. This fuse is 20 amps and 250 volts. This part powers your microwave. If your appliance is not heating properly, or is not turning o...
In Stock

Note: As per the manufacture the original cover was made with one hole, the part is now made with three holes.
No Longer Available

$38.50
This part is the replacement grease filter for your microwave. It is metallic in color and is approximately 15 inches wide and 8 inches deep. The grease filter is found on the bottom of your microwave...
In Stock

$28.17
This is the replacement charcoal filter for your microwave. It is silver and black in color and measures approximately 11 inches by 2 ½ inches. The charcoal filter removes cooking odors from the air ...
In Stock

In Stock

This roller guide sits underneath the glass turntable tray.
In Stock

In Stock

$85.94
This kit contains 2 switches - 15 Amp - 125/250 Volt with 3/16" terminals.
In Stock

This support stud is sold individually. It is used to hold up wire shelves in refrigerators.
No Longer Available
Questions and Answers
We're sorry, but our Q&A experts are temporarily unavailable.
Please check back later if you still haven't found the answer you need.
Common Problems and Symptoms for ACO1840AW
Viewing 5 of 5No heat
Fixed by these parts
How to fix it
Won’t turn on
Fixed by these parts


How to fix it
Tray won’t turn
Fixed by these parts

How to fix it
Doesn’t shut off
Fixed by these parts
How to fix it
Door not closing properly
Fixed by these parts

How to fix it


Keep searches simple. Use keywords, e.g. "leaking", "pump", "broken" or "fit".
- Customer:
- Deborah from Millersville, MD
- Parts Used:
- 8206232A
- Difficulty Level:
- Difficult
- Total Repair Time:
- Less than 15 mins
- Tools:
- Screw drivers
light bult needed to be replaced
The nightmare was that this microwave is installed under the cabinet....in order to get to the light bulb I had to pull out my stove then squeeze into the space between the stove and counter....my old microwave light bult was much easier to change.....Shame on Whirlpool for making this so difficult.....must be a better way to cover the li
... Read more
ght bulb so that we do not need a screwdriver to remove the door to get to the light bulb
Read less
Was this instruction helpful to you?
Thank you for voting!
- Customer:
- Guy from Bellingham, MA
- Parts Used:
- WP59001168, WPR9800486
- Difficulty Level:
- Really Easy
- Total Repair Time:
- 15 - 30 mins
- Tools:
- Pliers, Screw drivers
Sparks and loud hum from oven
1. I went to the internet to find the service manual for the Maytag microwave.
2. I opened up the oven and started measuring the resistance of the diode, capacitor, transformer, and magnetron between terminals and then to ground. The transformer and magnetron were well within the resistance limits. The diode was shorted in both direc ... Read more tions(+-). The capacitor was fully open in both directions -- high resistance.
3. I ordered the 2 parts, installed them, and ran the oven. Worked perfect first time.
4. Reinstalled oven and worked ever since (1 week so far).
5. The secret was that the transformer had a load hum. I figured the transformer was OK. The magnetron had no short between filaments and ground to filaments. The only two left were the diode and capacitor. The first two are about $200 -- almost the value of a new microwave. The $70 repair was well worth it. If the first two were still bad, then tempted to buy a new oven.
Read less
Was this instruction helpful to you?
Thank you for voting!
- Customer:
- Joseph from Pembroke, MA
- Parts Used:
- 8206232A
- Difficulty Level:
- Really Easy
- Total Repair Time:
- Less than 15 mins
- Tools:
- Screw drivers
Bulb "burnt out"
Removed 1 screw, removed "burnt out" bulb and replaced it with new bulb.
Was this instruction helpful to you?
Thank you for voting!