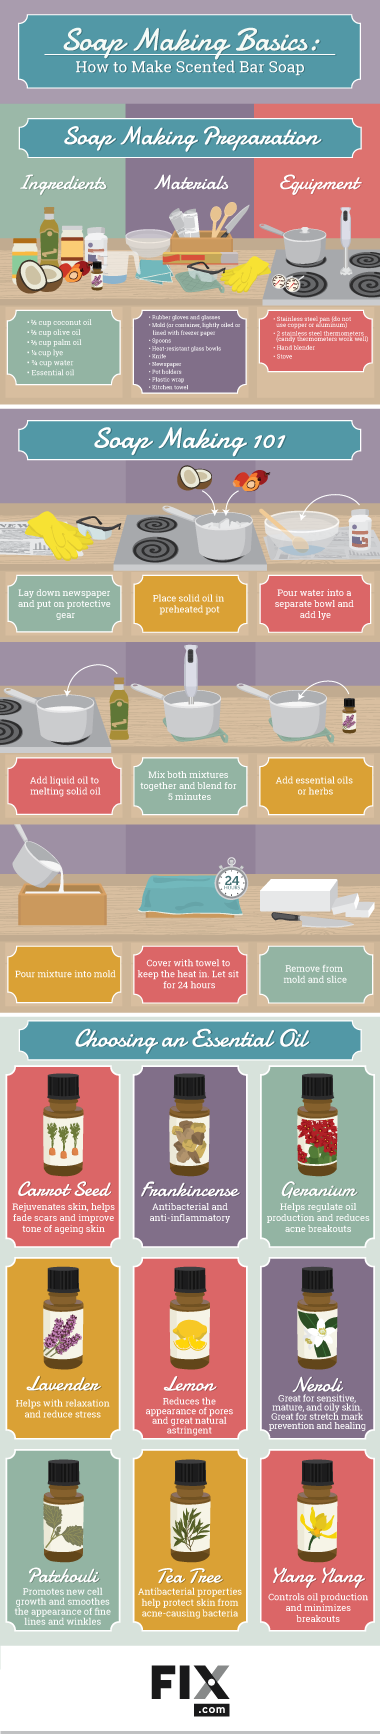
Soap Making Basics
How to Make Scented Bar Soap
Soap making is a creative art that has been around for thousands of years.
The beauty of crafting your own soap is that you can choose the scent,
color, and size, and it’s much more cost-effective than buying soap at
the store. The soap-making process takes about an hour; however,
the cooling and curing process takes around four weeks. So, if you
are making a batch for yourself or for gift giving, take that time
into consideration. Here is some basic information on soap making
and how to make scented bar soap using the cold process.
The cold process is the most common, basic soap-making process.
You can make soaps in a variety of different shapes thanks to the
abundance of molds available on the market today. Flowers, ovals,
shells – if you can name it, there’s a soap mold for it. Wooden
molds are ideal for cold-process soap making. You can not only
play with the shape but also customize your soap by adding
dried flower petals, dried herbs, and fragrance or essential
oils. With a few ingredients and the proper equipment, you
can make your own handmade bar soap.
Working with Lye
Before you begin, it’s important to know a little bit about working with lye.
You can’t make soap without it. Lye is also known as sodium hydroxide. The chemical
reaction between lye and fats produces a solid soap, also known as the saponification
process. Therefore, you have to be careful and protect yourself during
projects like this. Wear rubber gloves, goggles, and an apron to help
protect your skin. Some fumes may rise when mixing lye with water, so
be sure to move your face away. The fumes will only last one to two minutes.
You cannot typically buy lye in a grocery store anymore, but you can find it
online or in a hardware store near the drain cleaning supplies. When you purchase
it, make sure it is 100 percent sodium hydroxide.
Procedure:
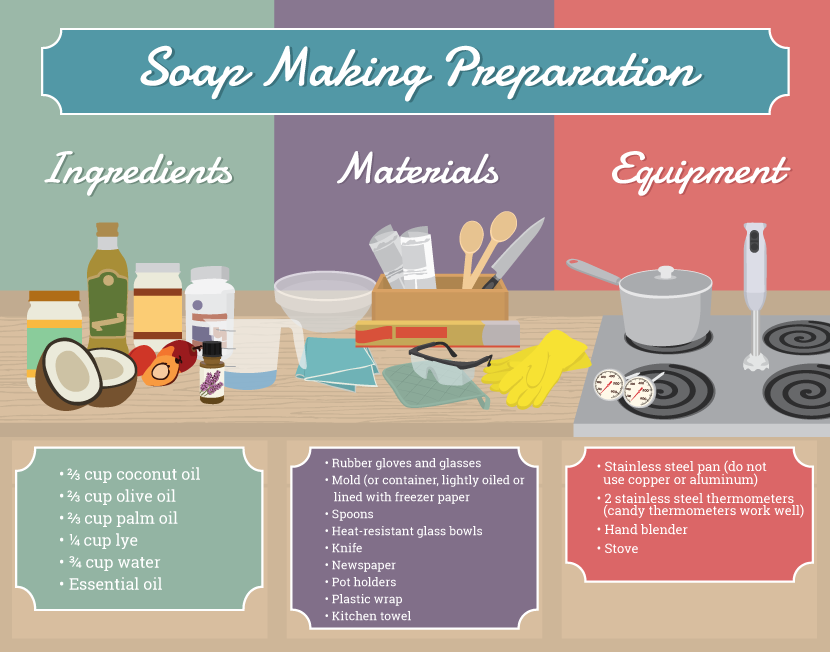
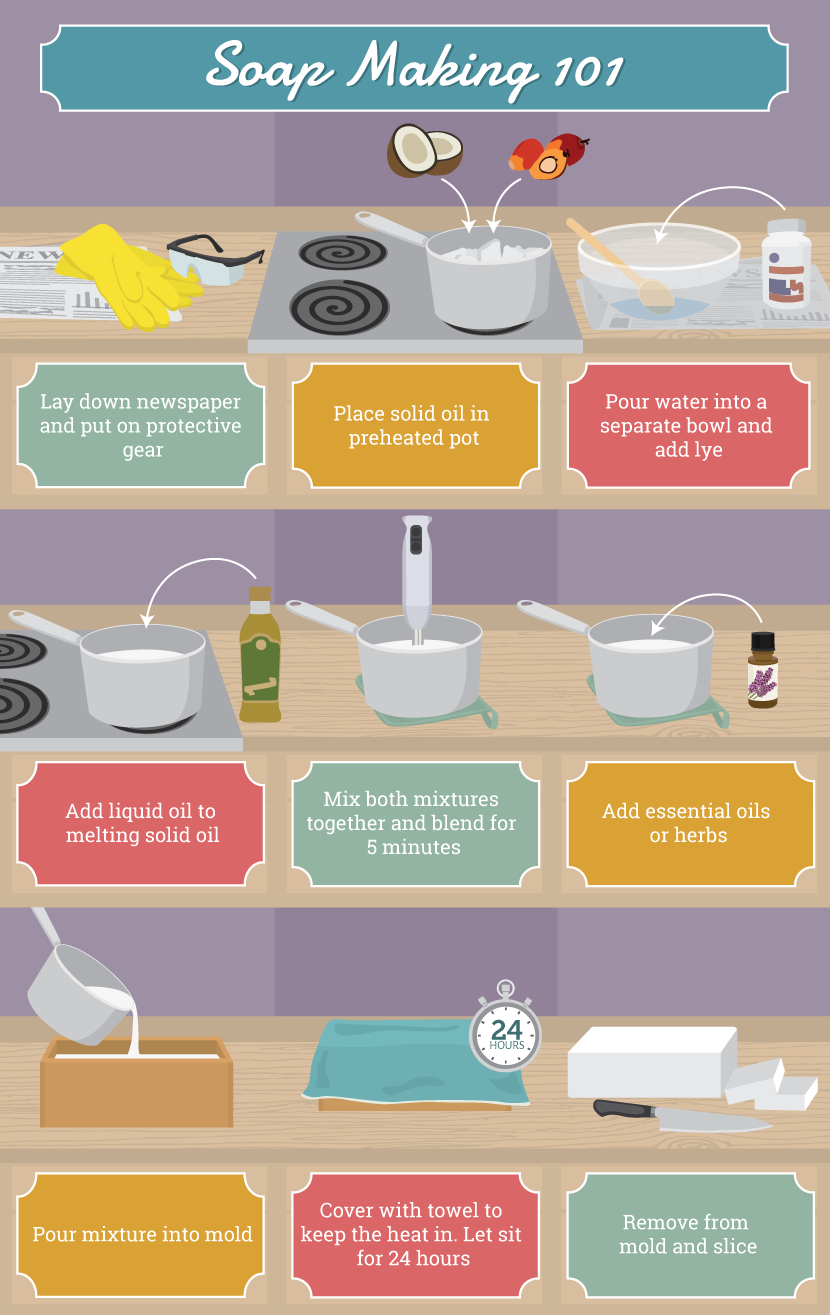
- 1. Protect your work area with newspaper, put on your protective gear,
and measure your water and lye.
- 2. Combine the coconut oil and palm oil, and place them in a preheated
pot until they melt. You can use different types of oils; however, remember
that for this step, the two oils you choose must be solids.
- 3. While the oil is melting, pour water into a bowl, and then slowly
pour the lye in the water. Don’t forget, there will be some fumes and heat!
Stir the mixture for about five minutes to ensure that it is mixed well.
- 4. Now it’s time to add your liquid form oil. Measure your olive oil
and then add it to the melted solid oils. You want the temperature to be about
110–120 degrees F.
- 5. Once both the lye mixture and oil mixture reach about 110–120 degrees,
pour the lye mixture into the pot with the oil mixture. Blend with a hand blender
for a full five minutes.
- 6. Add about a teaspoon of the essential oils of your choice.
You can also add colorant and/or herbs if you’d like.
- 7. Carefully pour your mixture into your mold.
- 8. Cover your mold with plastic wrap, and then put a towel over it to
keep the heat in.
Curing Handmade Soap
Allow your mold to set for at least 24 hours. When you check on it,
the soap will be hard and opaque. If the soap is still warm, allow it to
cool for a few more hours. Once the soap is completely cool, remove the mold.
Cut the soap into thick bars. Allow it to cure for about one month in a
dust-free area before you use it. You can turn the bars over frequently
during curation.
Storing Handmade Soap
You can store it in a shoebox. Be sure to place a space in between each
bar standing them up to allow them to breath. Shoeboxes work well because
they allow your soap to breathe, unlike a sealed plastic container. Keep
them out of direct sunlight in a cool place. Handmade soap should store
up to 12 months, some longer. Depending on the type of essential oil you use,
the scent may fade after several months. Be sure to store similar scents
together if you are making it in bulk. For example, store citrus scents
in one shoebox and minty scents in another shoebox.
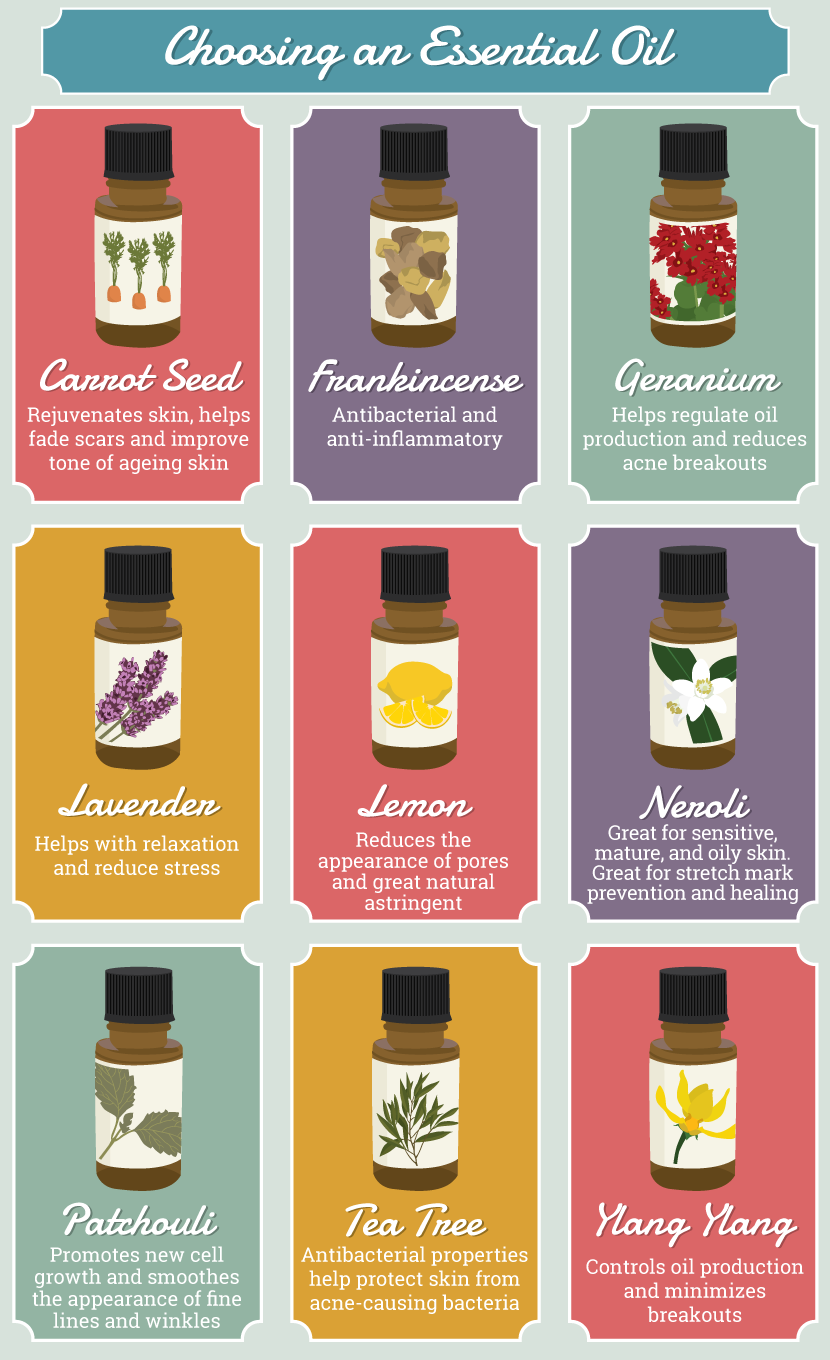
More about Additives
Once you get the process down, you can play around with different additives,
such as coffee grinds, oatmeal, or cocoa powder; herbs such as lemongrass or mint;
and spices such as ginger, cinnamon, or cloves. You can also use different oils and
butters. To scent your soap, you can use essential oils and fragrant oils.
They both work well if you choose good-quality oil. The main difference between
the two is that essential oils are natural, whereas fragrant oils have chemical
components. For an interesting look, you can get creative and mix colors to
swirl your soaps in different color combinations, stamp your soap, color block
it, or even infuse it.
As you can see, numerous possibilities and combinations of oils,
butters, and additives are out there for soap making. The finished product,
handmade bars of soap, make great DIY gifts because soap is an inexpensive
craft that you can make in bulk and personalize. You can wrap your bars in
textured papers, tie it up with twine, and add a tag for a special touch.
Embed the article on your site