Getting the Most from your Combination Square
A combination square is such a ubiquitous tool that many woodworkers take it for granted and do not get the most from it.
Let’s take a look at some of the more interesting uses for this tool.
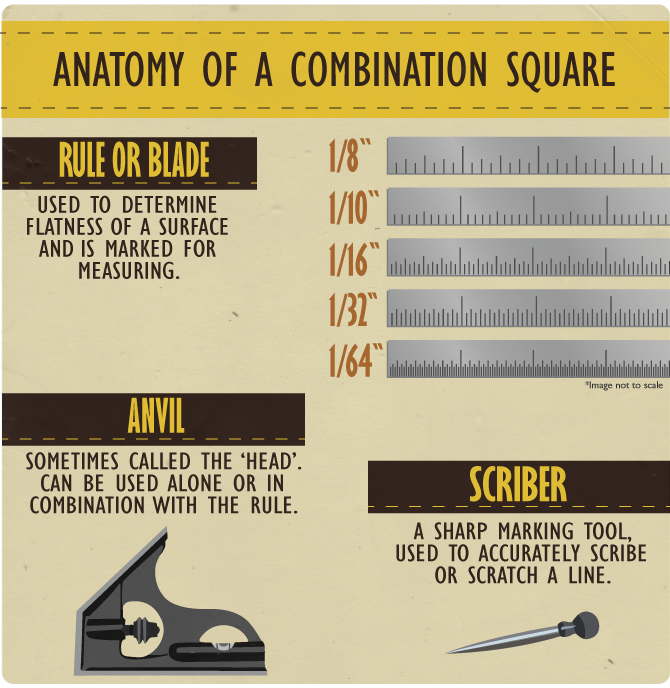
Anatomy of a Combination Square
The Rule or Blade
This straight edge is used to determine flatness of a surface.
Better-quality rules are hardened steel and accurately etched.
The Anvil
Sometimes called the "head", the anvil can
be used alone or in combination with the rule. The anvil
contains a draw bolt that secures the rule and is tightened via a
thumbscrew. This innovation is the primary driver of the combination
square’s popularity: it allowed the user to adjust the rule,
something you could not do with a traditional fixed-blade try square.
The Scriber
This sharp marking device is built into the anvil.
It is used to accurately scribe or scratch a line. This tool-within-a-tool
comes in handy in the field if you don’t have a marking knife, or need more
accuracy than a pencil can provide. The scratched-in scribe lines also have
the advantage of not smearing.
Common Uses
A combination square is most often used for striking a perpendicular line relative to the edge the anvil is touching,
and measuring short distances, but this barely scratches the surface of what this versatile tool can do.
In woodworking, the ability to do work faster and more efficiently is often crucial to success.
Historically, a bench carpenter would need several dedicated tools – try square, marking gauge, miter square,
level, etc. – to carry out the same jobs a single modern combination square is able to tackle with ease.
Let’s take a look at some of the ways a combo-square can help you de-clutter your workbench.
Determining Level
The built-in spirit level in the anvil can be used as a simple level.
When the bubble is centered between the two lines on the vial you know
the piece you are checking is level at that location.
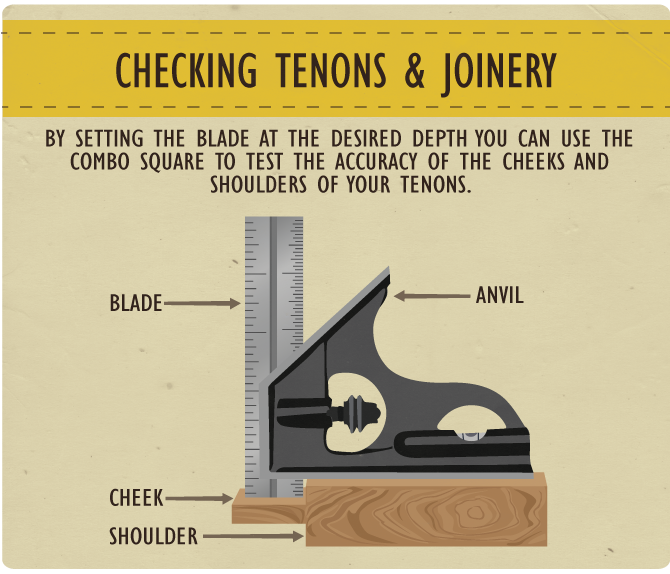
Checking Tenons and Similar Joinery
By setting the blade at the desired depth you can use the
combo square to test the accuracy of the cheeks and
shoulders of your tenons.
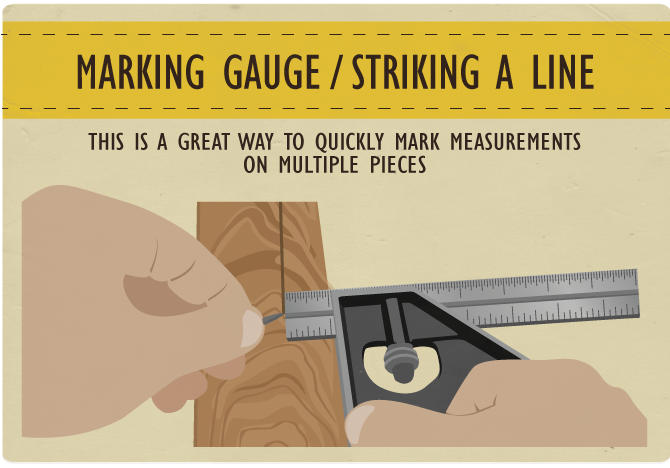
Marking Gauge/Striking a Line
When laying out joinery, it is often useful to strike
a line parallel to the edge of the piece you are working on. Normally this would
be accomplished with a dedicated marking gauge. You can achieve this by setting the
square to the desired offset and running the square down the side of the piece with
one hand while striking the line with the scriber or a marking knife pressed up
against the rule. This process is also a great way to quickly and accurately
transfer measurements to multiple work pieces.
Depth Gauge
When plowing a groove or cutting a mortise you’ll need to check the depth.
Similar to how we checked a tenon for square we can plunge the blade of a combo square
into a dado or mortise and check the depth. By moving the square around you can also
feel any high spots or crumbs that need to be removed.
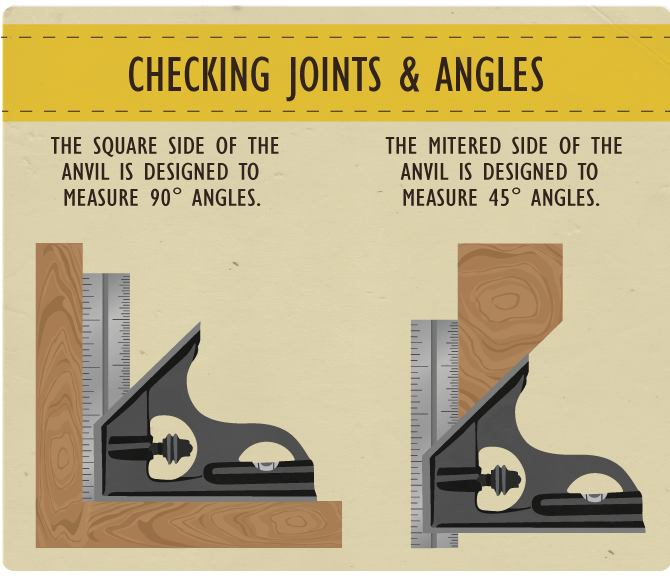
Checking for Square (Inside and Outside)
With the blade fully retracted you can also test inside and
outside corners of a piece for square. This comes in
handy when testing a cabinet carcass or frame.
Checking a 45-degree Miter
So far, we’ve spent most of our time
working with the squared off (90-degree) side of the anvil relative to the blade.
The other side of the anvil is machined to be 45 degrees. This common angle is used when testing
a 90-degree miter joint – each half of the joint is 45 degrees – and is often used in picture framing,
trim carpentry, and for many other similar jobs. Much as we tested a piece for square we can
test a piece for how accurate it is relative to 45 degrees. This relieves us
from needing a dedicated 45-degree miter square.
The above uses are pretty handy, but what do you do if your work is not all rectilinear?
There are some handy accessories that can augment what this tool can do.
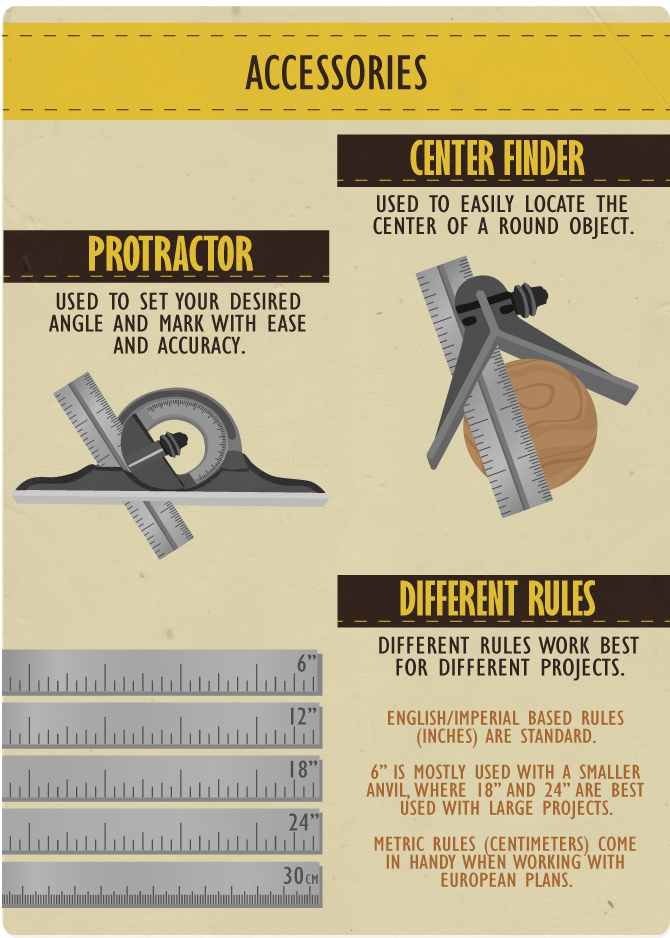
Accessories
Center Finder
The center finder attachment is great for finding the center of a round object.
You place the wood blank against this center-finding anvil and strike a line. Then rotate the
object and strike one or more additional lines. Where the lines all cross is the center. This
comes in handy when working at the lathe, where you want a quick way to find and mark the
center before mounting the piece onto the lathe.
Protractor
The protractor attachment allows you to
set the rule at any angle relative to the anvil face.
Thus, for complex layout tasks–like an eight-sided picture frame
or laying out a dovetail–you can set your desired angle and mark
with ease and accuracy.
Different Rules
The scale of your work also affects what type of
combination square will work best for you. If you do a lot of large-scale
work you’ll want to consider an 18"- or 24"-long rule. If you work with
a lot of European tools and plans you will want to seek out a metric rule.
If you work on smaller projects you will want a six-inch combination square
with a smaller anvil that can fit in an apron pocket.
Now that you’ve seen a lot of what this versatile tool can do,
you may want to go out and buy one. But where should you start?
Buyer’s Guide
- 1. Buy a machinist-quality square with a hardened blade, anvil, level, and scriber. You get what you pay for: skimping on this layout tool can lead to inaccuracies in your work
- 2. Make sure the blade size is appropriate for the scale of work you are going to be doing (see Different Rules, above)
- 3. Consider buying a set that includes some or all of the accessories you think you’ll need. If you cannot afford such a set,
buy from a reputable brand that is likely to still be around when you need to get accessories in the future
- 4. If you buy a used combination square you’ll want to check to
make sure it’s tuned and square. Strike a line, reverse the square,
and strike another in the same place. If the lines are not exactly on
top of each other, the square is out of true.
You can also refer to this
which talks more generally about making sure a square is actually square
When you invest in a quality combination square and using it to its full potential, your layout work, efficiency, and end results will all benefit.
Embed the article on your site