Crafting with Burlap
Tips and Tricks for Adding a Rustic Touch
From stenciled placemats to elaborate wreaths, there is a plethora of burlap crafts and projects circulating
around social media. Some projects are easier than others, but every crafter struggles with the fraying and
mess of working with burlap, as well as its care after the crafting is complete. This article will give detailed
tips to make working with burlap less difficult and also show how to wash it, care for it, and store it after
your project is complete. It will also suggest some quick how-to tips and ideas for burlap craft projects.
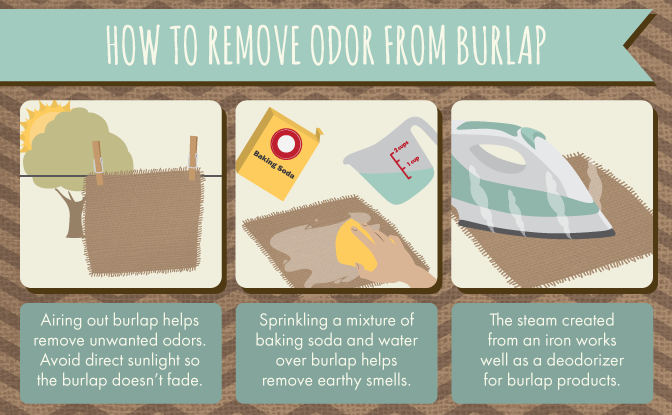
Removing Odors
Depending on the project, I typically work with burlap without washing it first. However, there are times
I reuse burlap coffee bean sacks or bean sacks because I like to repurpose. These types of second-hand burlap
come with a strong earthy odor. I know of three ways to remove tough odors from burlap. One is to lay the burlap
outside in the fresh air for a few days. The strength of the odor will determine the length of time it needs to
stay in the fresh air. Keep it out of direct sunlight to keep the material from fading. The exception to direct
sunlight is when your fabric has a stain, which the sun will help to bleach. If airing the burlap out doesn’t
work or you don’t have the time, try sprinkling the material with baking soda diluted in water. Dab the
mixture onto the burlap and let it dry. A third way to rid burlap of odor is to steam-iron it. Place the
iron on a high setting and use the steam function or a spray water bottle. Iron lightly, while allowing
the steam to penetrate through the fibers.
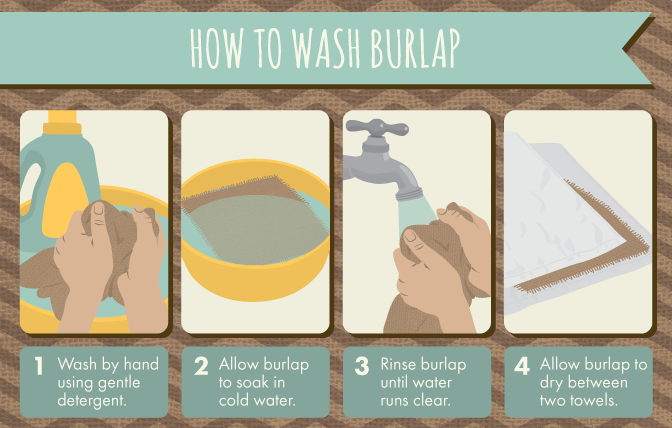
Washing
If it is necessary to wash your burlap, I suggest doing so by hand. Wash your burlap in the sink with
cold water and a gentle detergent – avoid any harsh chemicals.
Tip: Hot or even warm water may cause shrinkage. Handle the burlap gently to avoid fraying or unraveling.
Allow the material to soak for a few minutes. Rinse it with cold running water until the water runs clear.
You can machine-wash some burlaps in cold water on a hand-wash setting, but be prepared for a messy lint trap
and a lot of fraying, and the need to clean your washer afterwards. To dry burlap, lay it flat in between two
large towels and place pressure on it to absorb the water. To prevent distortion and fiber separation, avoid
twisting and wringing out the water. Drying the burlap outside is fine too, but keep it out of direct sunlight to prevent fading.
Fraying
Depending on your project, you can use a liquid seam sealant like Fray Check to stop the burlap from fraying.
Protect your work surface with cardboard and keep the sealant out of reach of children. Allow it to dry
completely (about 30 minutes). Some seam sealants will not dry clear on burlap, so it’s a good idea to test
them on a small piece of your burlap first.
Wrinkles
Using spray starch, iron the wrinkles out of your burlap (this helps with odor, too). A high linen setting
works nicely. You can also try steaming it on high heat as well. When storing your burlap curtains, table runners,
or table cloths, avoid creases by rolling the burlap rather than folding it.
Crafting with Burlap
Lots of crafters love making crafts out of burlap these days. It’s inexpensive, rustic yet feminine in style, and
timeless. We use it for weddings, showers, and even home décor projects like pillows, curtains, or wreaths. Burlap is
perfect for dining and entertaining. Using it for table linens, table runners, placemats, and napkin rings provides the
allure of natural fibers in a chic country setting for a special occasion, holiday, or event. From a simple upcycled vase
to a beautiful upholstered piece of furniture, the possibilities are endless.
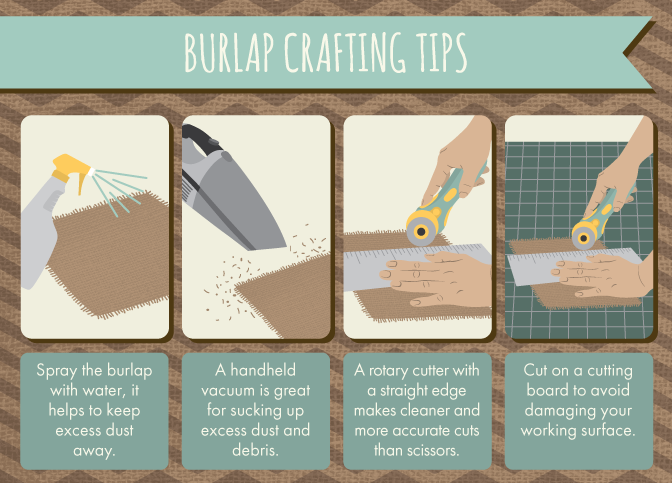
To prepare for your project, keep a spray bottle of water and handheld vacuum handy. Shake off the excess burlap debris
outdoors or vacuum it with a handheld attachment to remove dust and loose fibers. Trust me: you’ll be glad you did. Don’t
forget to protect your work surface as well. Keep in mind that your clothes, carpet, and floor will likely be covered
in debris and prepare them accordingly.
Here are a few tips to keep in mind when cutting burlap. To reduce dust, lightly mist the material with water
from a spray bottle before cutting it. A rotary cutter with a straight edge is less messy and more accurate than scissors.
If you use scissors, choose a thread line in the burlap where you want your straight edge to be. Gently pull the thread all
the way out of the fabric. There will be a clear line to guide a straight cut.
Craft Projects to Inspire You
Burlap is one of the easiest fabrics to stencil. Consider stenciling a monogram on your home décor projects to add a personal touch.
It is simple, dries quickly, and rarely bleeds. When stenciling burlap, use a spouncer brush and acrylic craft paint. Cover the spouncer
completely with paint. Before you stencil, dab the excess paint onto a paper plate. Stencil in an up-and-down motion. This will reduce,
if not prevent, bleeding. Two light coats of paint are better than one heavy coat. The paint will dry in approximately 15 minutes.
Wash your stencils immediately after use to keep them clean.
For small craft projects, consider working with burlap ribbon, especially to reduce the mess. These days, burlap ribbon comes in a variety of
colors and patterns. Not only can you use if for gift wrapping, you can craft with it to make wreaths, wrap around vases,
or embellish almost any home décor accent.
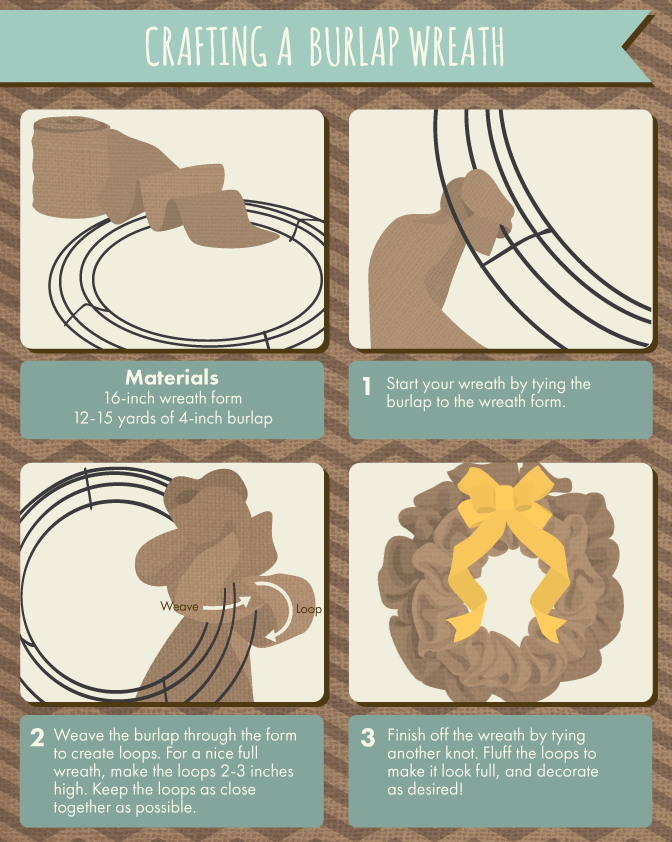
To make a wreath, use a wire wreath form. Loop the ribbon through the form to create small bunches of large loops and weave the ribbon,
alternating in and out of the rings of the wire wreath form. Secure the ribbon with floral wire.
Burlap décor is timeless. It can be styled with both antique and modern design elements in mind. It’s a naturally
rugged material that can be transformed into something beautiful. With these tips, you can execute, complete, and care for
that beautiful burlap craft project you have wanted to make with confidence and with a minimum of mess.
Embed the article on your site