Wall Oven Parts
Find Parts Fast
Guaranteed Fit
Repair Videos

Popular Wall Oven Parts
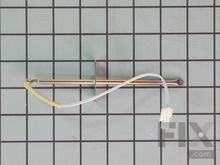
- Fix Number
- FIX471605
- Manufacturer Part Number
- 5304409888
Fixes these symptoms
- Element will not heat
- Little to no heat when baking
- Little to no heat when broiling
- See more...
- Fix Number
- FIX470129
- Manufacturer Part Number
- 5303935066
Fixes these symptoms
- Element will not heat
- Gas igniter glows, but will not light
- Gas smell
- See more...
Installation Instructions
Mary from Ticonderoga, NY
When turning on the oven, it would not ignite.
Unplug the power.Took off the broiler door . Reached in , unscrewed the two screws holding the igniter (one screw was stripped so that gave me a little problem) put on the new igniter. Stripped the wires & put the caps on. Plugged back in the stove & worked great.
Read more...
- Fix Number
- FIX249424
- Manufacturer Part Number
- WB44X200
Fixes these symptoms
- Element will not heat
- Little to no heat when baking
- Little to no heat when broiling
- See more...
Installation Instructions
greg from incline village, NV
30 year old bake element went south
Screws out, new ones in, done. The only thing I'll add which had me concerned was that the element photo shown on the one inch grid didn't show the mounting screws at 3.5" on center which is what my oven had. Fortunately, the picture notwithstanding, the new part was punched at 3.5" so it went right in.
Read more...
- Fix Number
- FIX820208
- Manufacturer Part Number
- 316217002
Fixes these symptoms
- Element will not heat
- Little to no heat when baking
- Oven is too hot
- See more...
Installation Instructions
Stephen from Ormond Beach, FL
Oven not heating to the set temperature
Suspected sensor based on above problem. The biggest problem was not knowing how hard it would be to get the built-in oven from its slot. Once it moved an inch, it was easy. The sensor inside the oven is a little hard to access because of the oven door. I would recommend a magnetic screw driver to make it easy to hold the sensor screws and allow reaching in the oven with one hand.
Read more...
- Fix Number
- FIX12008408
- Manufacturer Part Number
- SP0002651
- Fix Number
- FIX11740695
- Manufacturer Part Number
- WP308180
Fixes these symptoms
- Element will not heat
- Little to no heat when baking
- Oven is too hot
- See more...
Installation Instructions
peter from potomac, MD
Bake element burnt out
1 Turned off power to stove at distribution box. 2 Removed oven racks to make room to work. 3 Illuminated oven interior. 4 Selected screw driver with largest grip, and correct phillips bit. 5 Undid two screws holding element to back wall of oven. 6 Gently pulled element towards front of oven to expose spade connectors to internal wiring. 7 Separated connectors and removed element. 8 Replaced with new element by retracing steps 7 through 1. 9 Success! Two difficulties: A. The retaining screws were stuck with age, and required a large torque to release. B. Similarly the spade connectors were stuck and required care to separate without damaging the wiring.
Read more...
- Fix Number
- FIX10059162
- Manufacturer Part Number
- WB21X22134
Fixes these symptoms
- Element will not heat
- Little to no heat when baking
- Little to no heat when broiling
- See more...
Installation Instructions
Stuart from Parrish, FL
Oven temperature was erratic and finally would not preheat.
I was lucky to stumble on this website. There seemed to be many with the same problem. I ordered the part and hoped for the best. It arrived and I installed just as others had described. First, I unplugged the range. Removed the back cover (a central panel) with 4 screws. Familiarized myself with the plug-in thermal sensor. Went around front and loosened the single set screw for the probe (near the top of oven). Threaded the bad element out and rethreaded the new element from the front. In back, reinstall the plastic plug-in connector. Tightened set screw in the oven, plugged it in and tested. It worked! Put the back on and it was done. It took 31 minutes. Actually took longer to clean behind the stave than the repair. Thanks to all for advice.
Read more...
- Fix Number
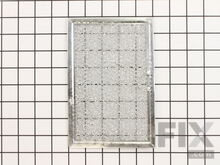
- FIX12713651
- Manufacturer Part Number
- 5230W1A012E
Installation Instructions
GRACE from CAMARILLO, CA
All greasy filter
I replace Charcoal filter by removing 4 screws on top microwave grille, remove it and i slid out the old filter and place the new one. The grease filters it took less than one minute to replace both.
Read more...
- Fix Number
- FIX1570174
- Manufacturer Part Number
- 12001656
Fixes these symptoms
- Door won’t open after self cleaning cycle
- Element will not heat
- Little to no heat when baking
- See more...
Installation Instructions
Michael from Pearl River, NY
Oven did not heat up
Removed the oven door, removed existing screws. Pulled wire carefully out of opening, unclip connection. Reattached connection screwed back new sensor attached oven door finished.
Read more...
- Fix Number
- FIX16218465
- Manufacturer Part Number
- 5304524341
Installation Instructions
Boyd from Birmingham, AL
Lens broken
Removed snap wire holding old lens in place, replaced bulb then centered new lens in place and put snap wire on new lens. Job done in 2 minutes. Easy as eating apple pie.
Read more...
Brands
- Admiral Wall Oven Parts
- Amana Wall Oven Parts
- Caloric Wall Oven Parts
- Crosley Wall Oven Parts
- Dacor Wall Oven Parts
- Electrolux Wall Oven Parts
- Frigidaire Wall Oven Parts
- General Electric Wall Oven Parts
- Gibson Wall Oven Parts
- Hardwick Wall Oven Parts
- Hoover Wall Oven Parts
- Hotpoint Wall Oven Parts
- Jenn-Air Wall Oven Parts
- Kelvinator Wall Oven Parts
- Kenmore Wall Oven Parts
- KitchenAid Wall Oven Parts
- Krups Wall Oven Parts
- LG Wall Oven Parts
- Litton Wall Oven Parts
- Magic Chef Wall Oven Parts
- Maytag Wall Oven Parts
- Norge Wall Oven Parts
- Roper Wall Oven Parts
- T-Fal Wall Oven Parts
- Tappan Wall Oven Parts
- Westinghouse Wall Oven Parts
- Whirlpool Wall Oven Parts
Related Pages
- Wall Oven Brackets and Flanges
- Wall Oven Caps and Lids
- Wall Oven Circuit Boards and Touch Pads
- Wall Oven Deflectors and Chutes
- Wall Oven Doors
- Wall Oven Drawers and Glides
- Wall Oven Ducts and Vents
- Wall Oven Elements and Burners
- Wall Oven Fans and Blowers
- Wall Oven Fuses
- Wall Oven Handles
- Wall Oven Handles and Latches
- Wall Oven Hardware
- Wall Oven Hinges
- Wall Oven Hoses and Tubes
- Wall Oven Igniters
- Wall Oven Insulation
- Wall Oven Knobs
- Wall Oven Latches
- Wall Oven Lights and Bulbs
- Wall Oven Motors
- Wall Oven Panels
- Wall Oven Racks
- Wall Oven Seals and Gaskets
- Wall Oven Sensors
- Wall Oven Springs and Shock Absorbers
- Wall Oven Switches
- Wall Oven Thermostats
- Wall Oven Transformers
- Wall Oven Trays and Shelves
- Wall Oven Trim
- Wall Oven Wire Plugs and Connectors
Popular Wall Oven Models
- MEW6530DDS Built-in, Electric
- KEBC208KSS02
- KEBC107KSS03
- PLEB30T8CCB Built-in, Electric
- PLEB30T9FCC Built-in, Electric
- KEBC208KSS0
- JS750SF1SS
- CWE5800ACB Built-in, Electric
- WW30430P Built-in, Electric, Wall
- MEW5530DDB Built-in, Electric
- NE59J7630SS ((AC)(0001)) Evn,5.9,120~240v 60hz,real Stainless
- JS630SF1SS
- KEBS107SSS04
- CWE5800ACE Built-in, Electric
- KEBS207SSS04
- KEBC208KSS04
- KEBS207BSS00
- NE58H9970WS ((AC)(0000)) 5.8 Cu. Ft. Induction Chef Collection Range Flex Duo Oven
- NE58H9970WS ((AA)(0001)) 5.8 Cu. Ft. Induction Chef Collection Range Flex Duo Oven
- NE58H9970WS ((AC)(0001)) 5.8 Cu. Ft. Induction Chef Collection Range Flex Duo Oven


